One of my favorite summer desserts is a fruit hand pie. They’re a great way to use up all of that delicious summer fruit, can be paired with a scoop of cold vanilla ice cream, and can even be taken on the go for all kinds of summer events.
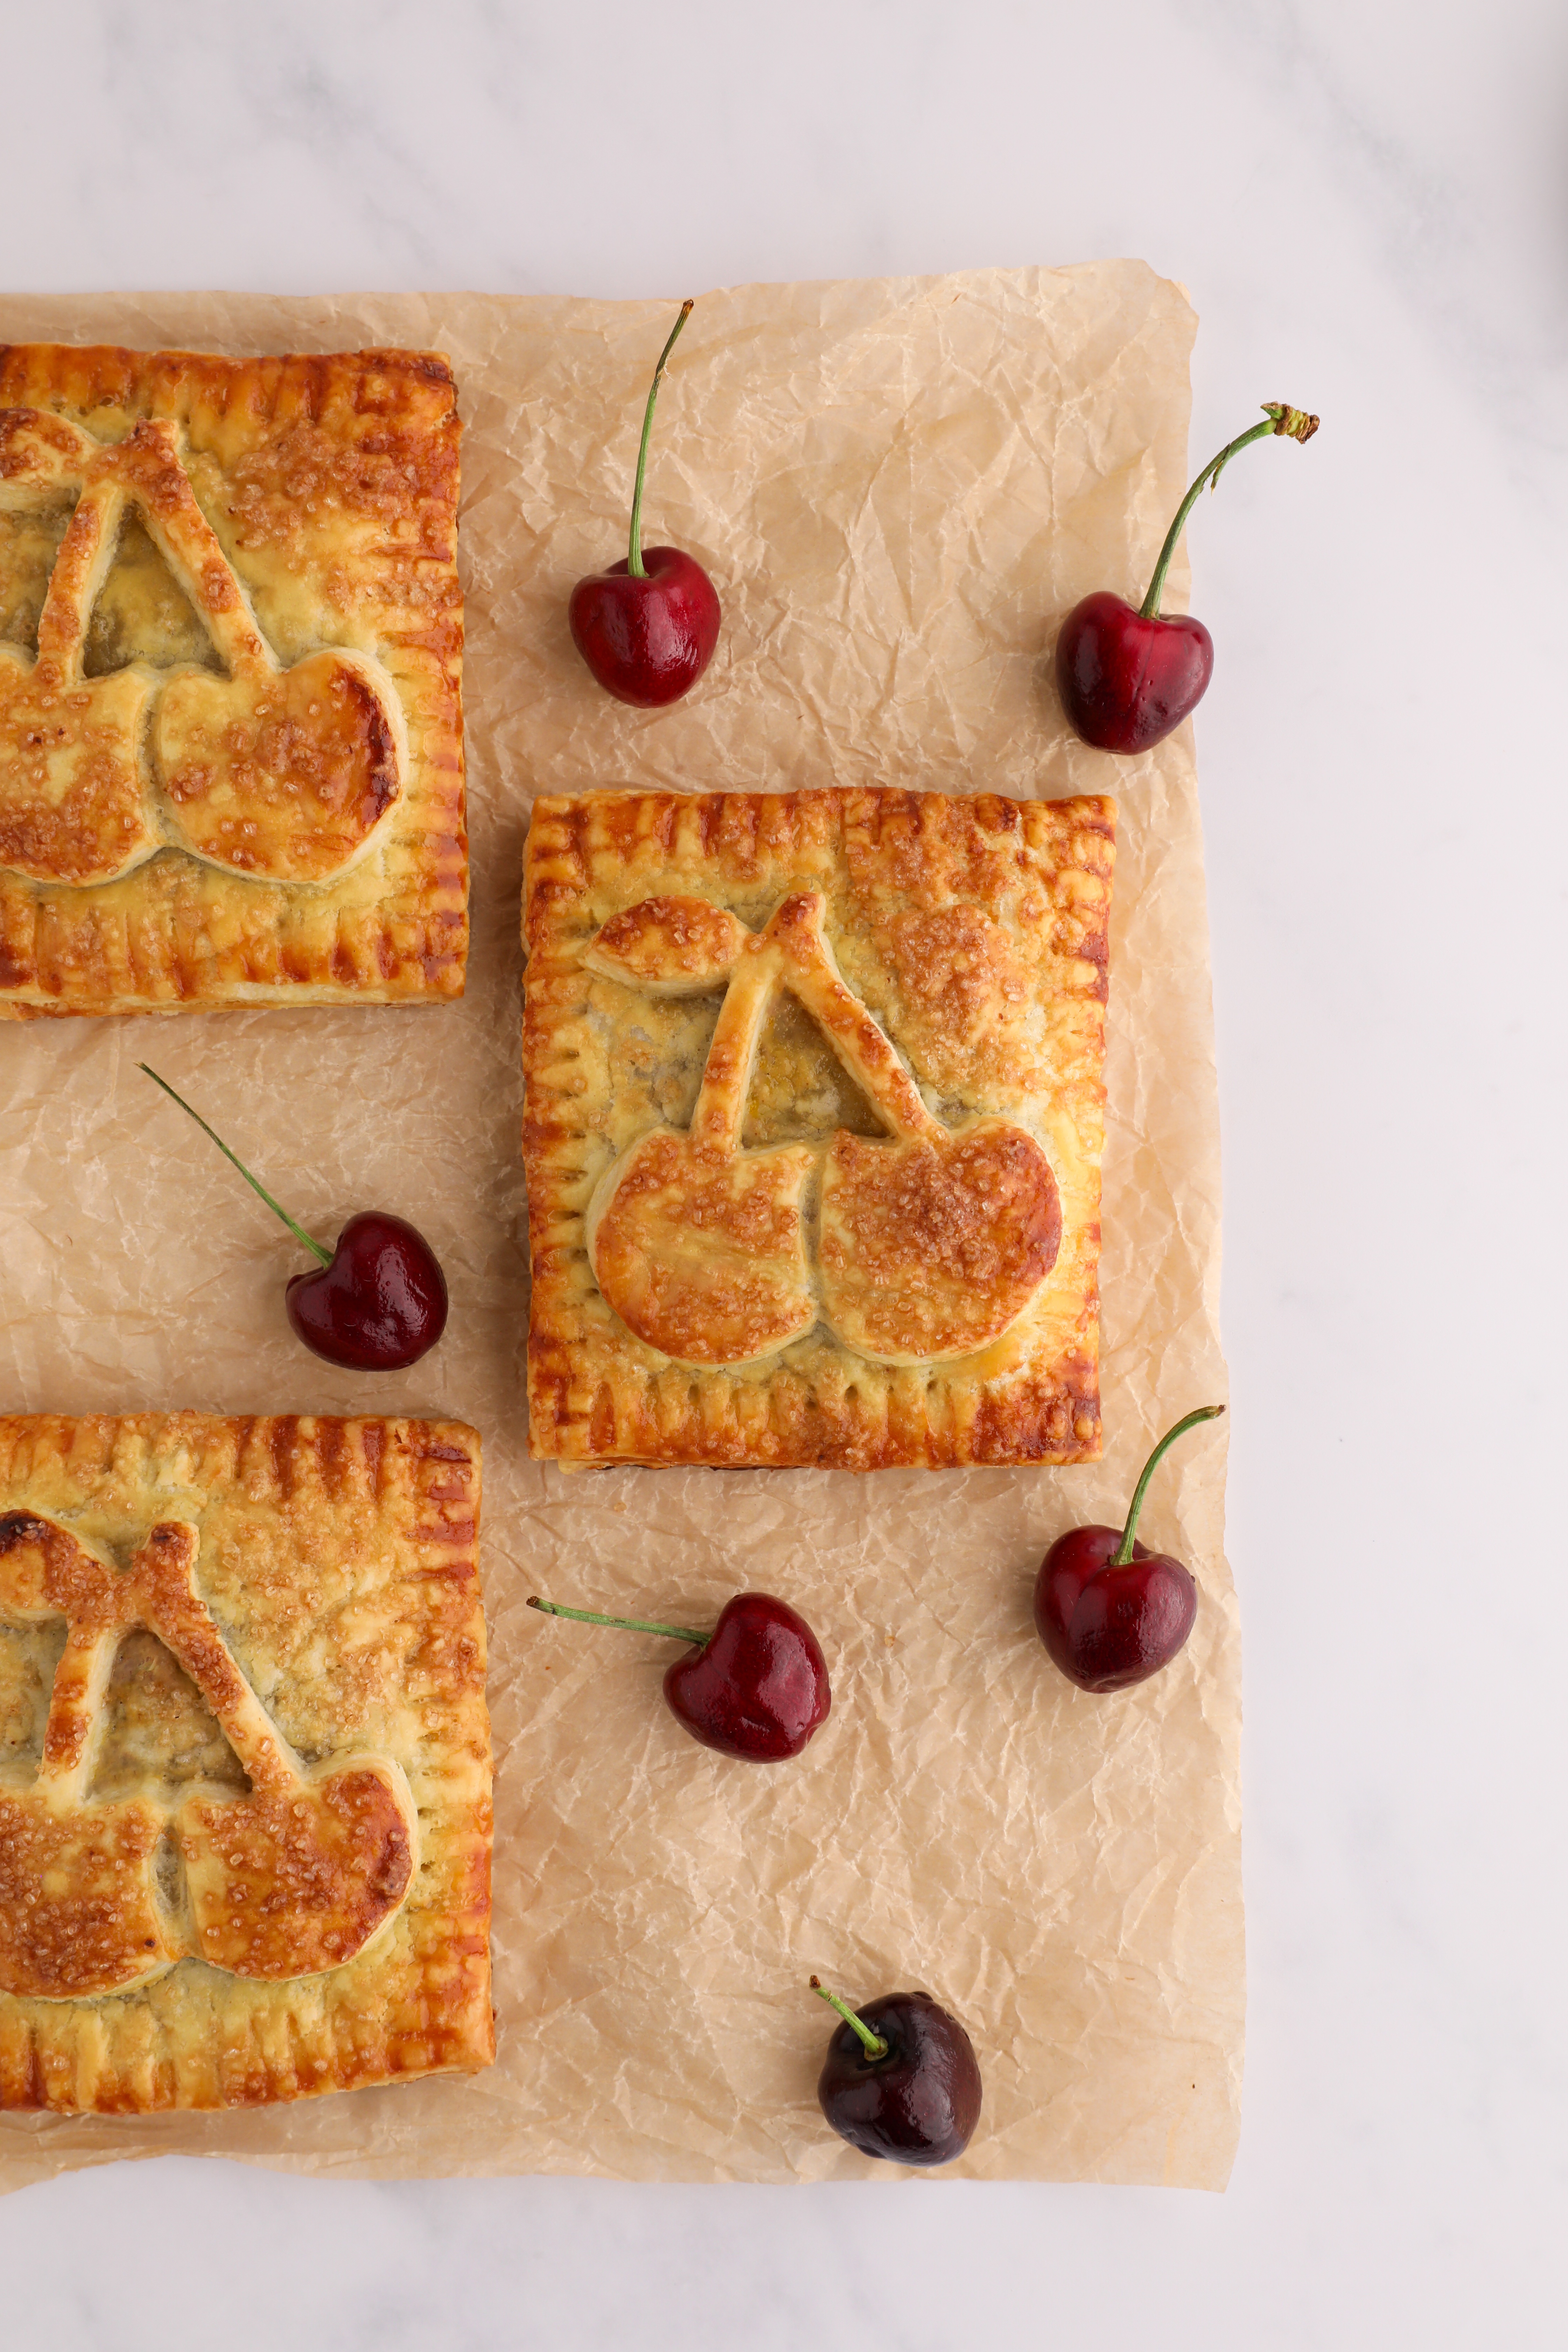
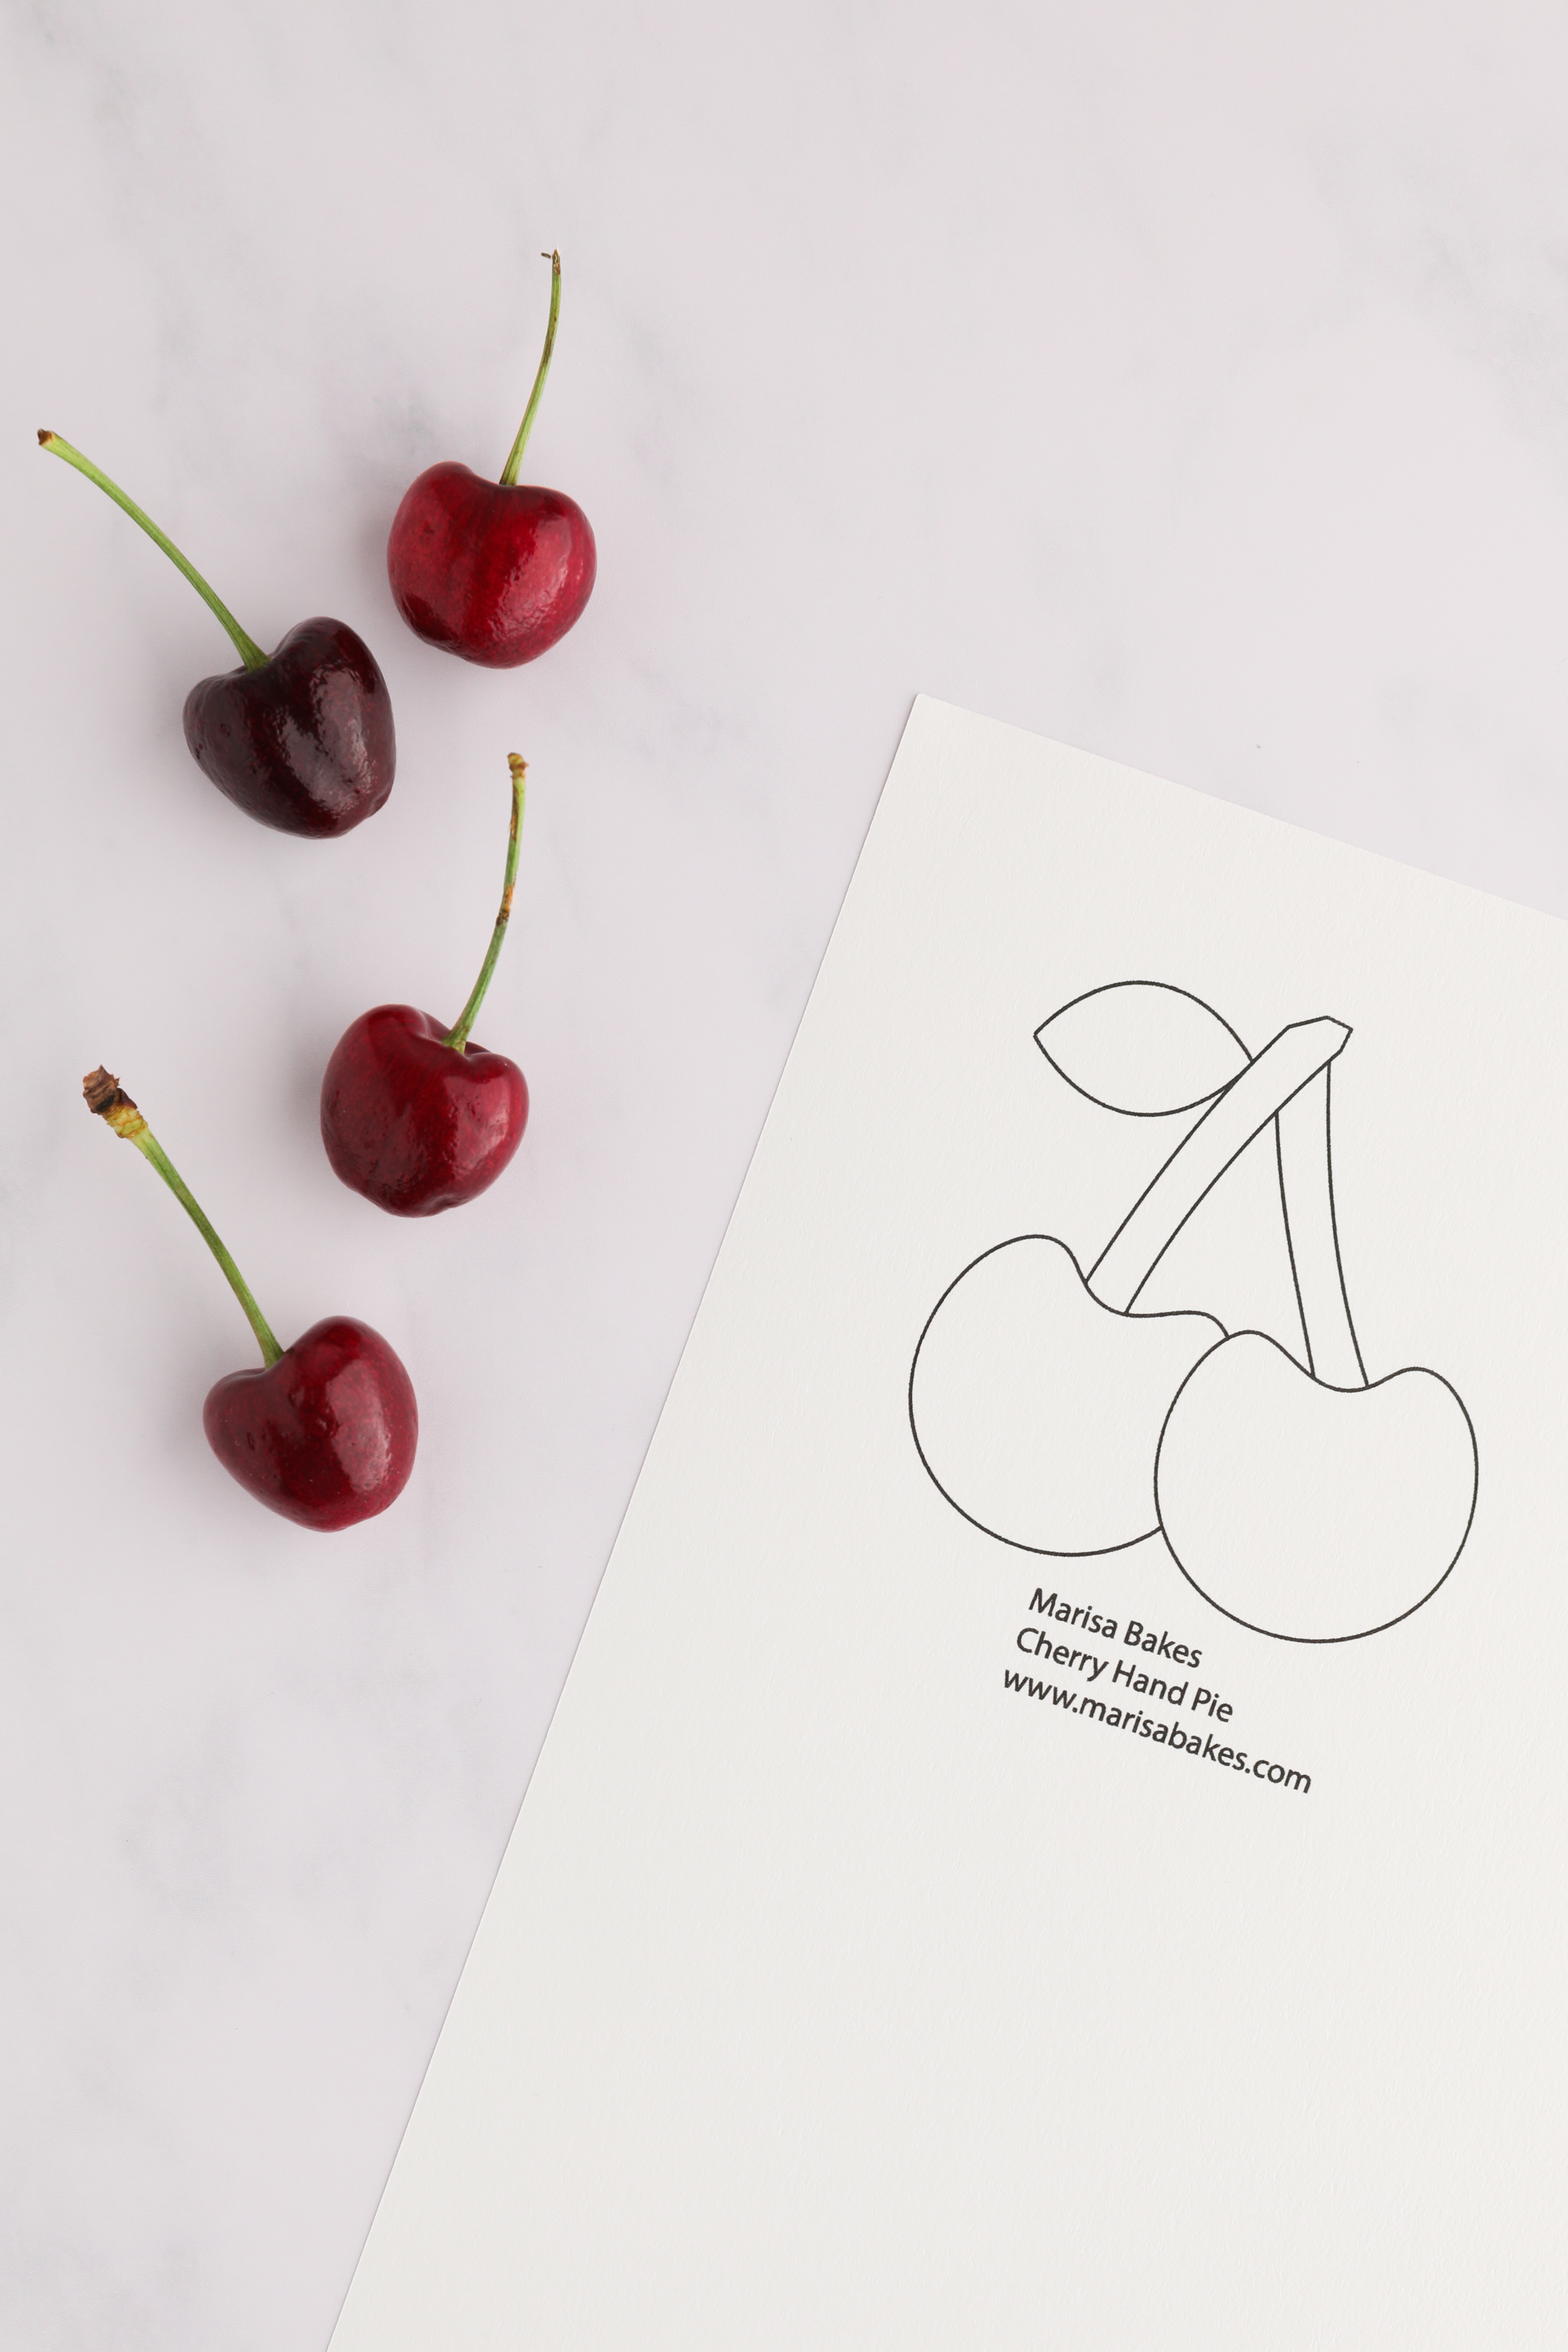
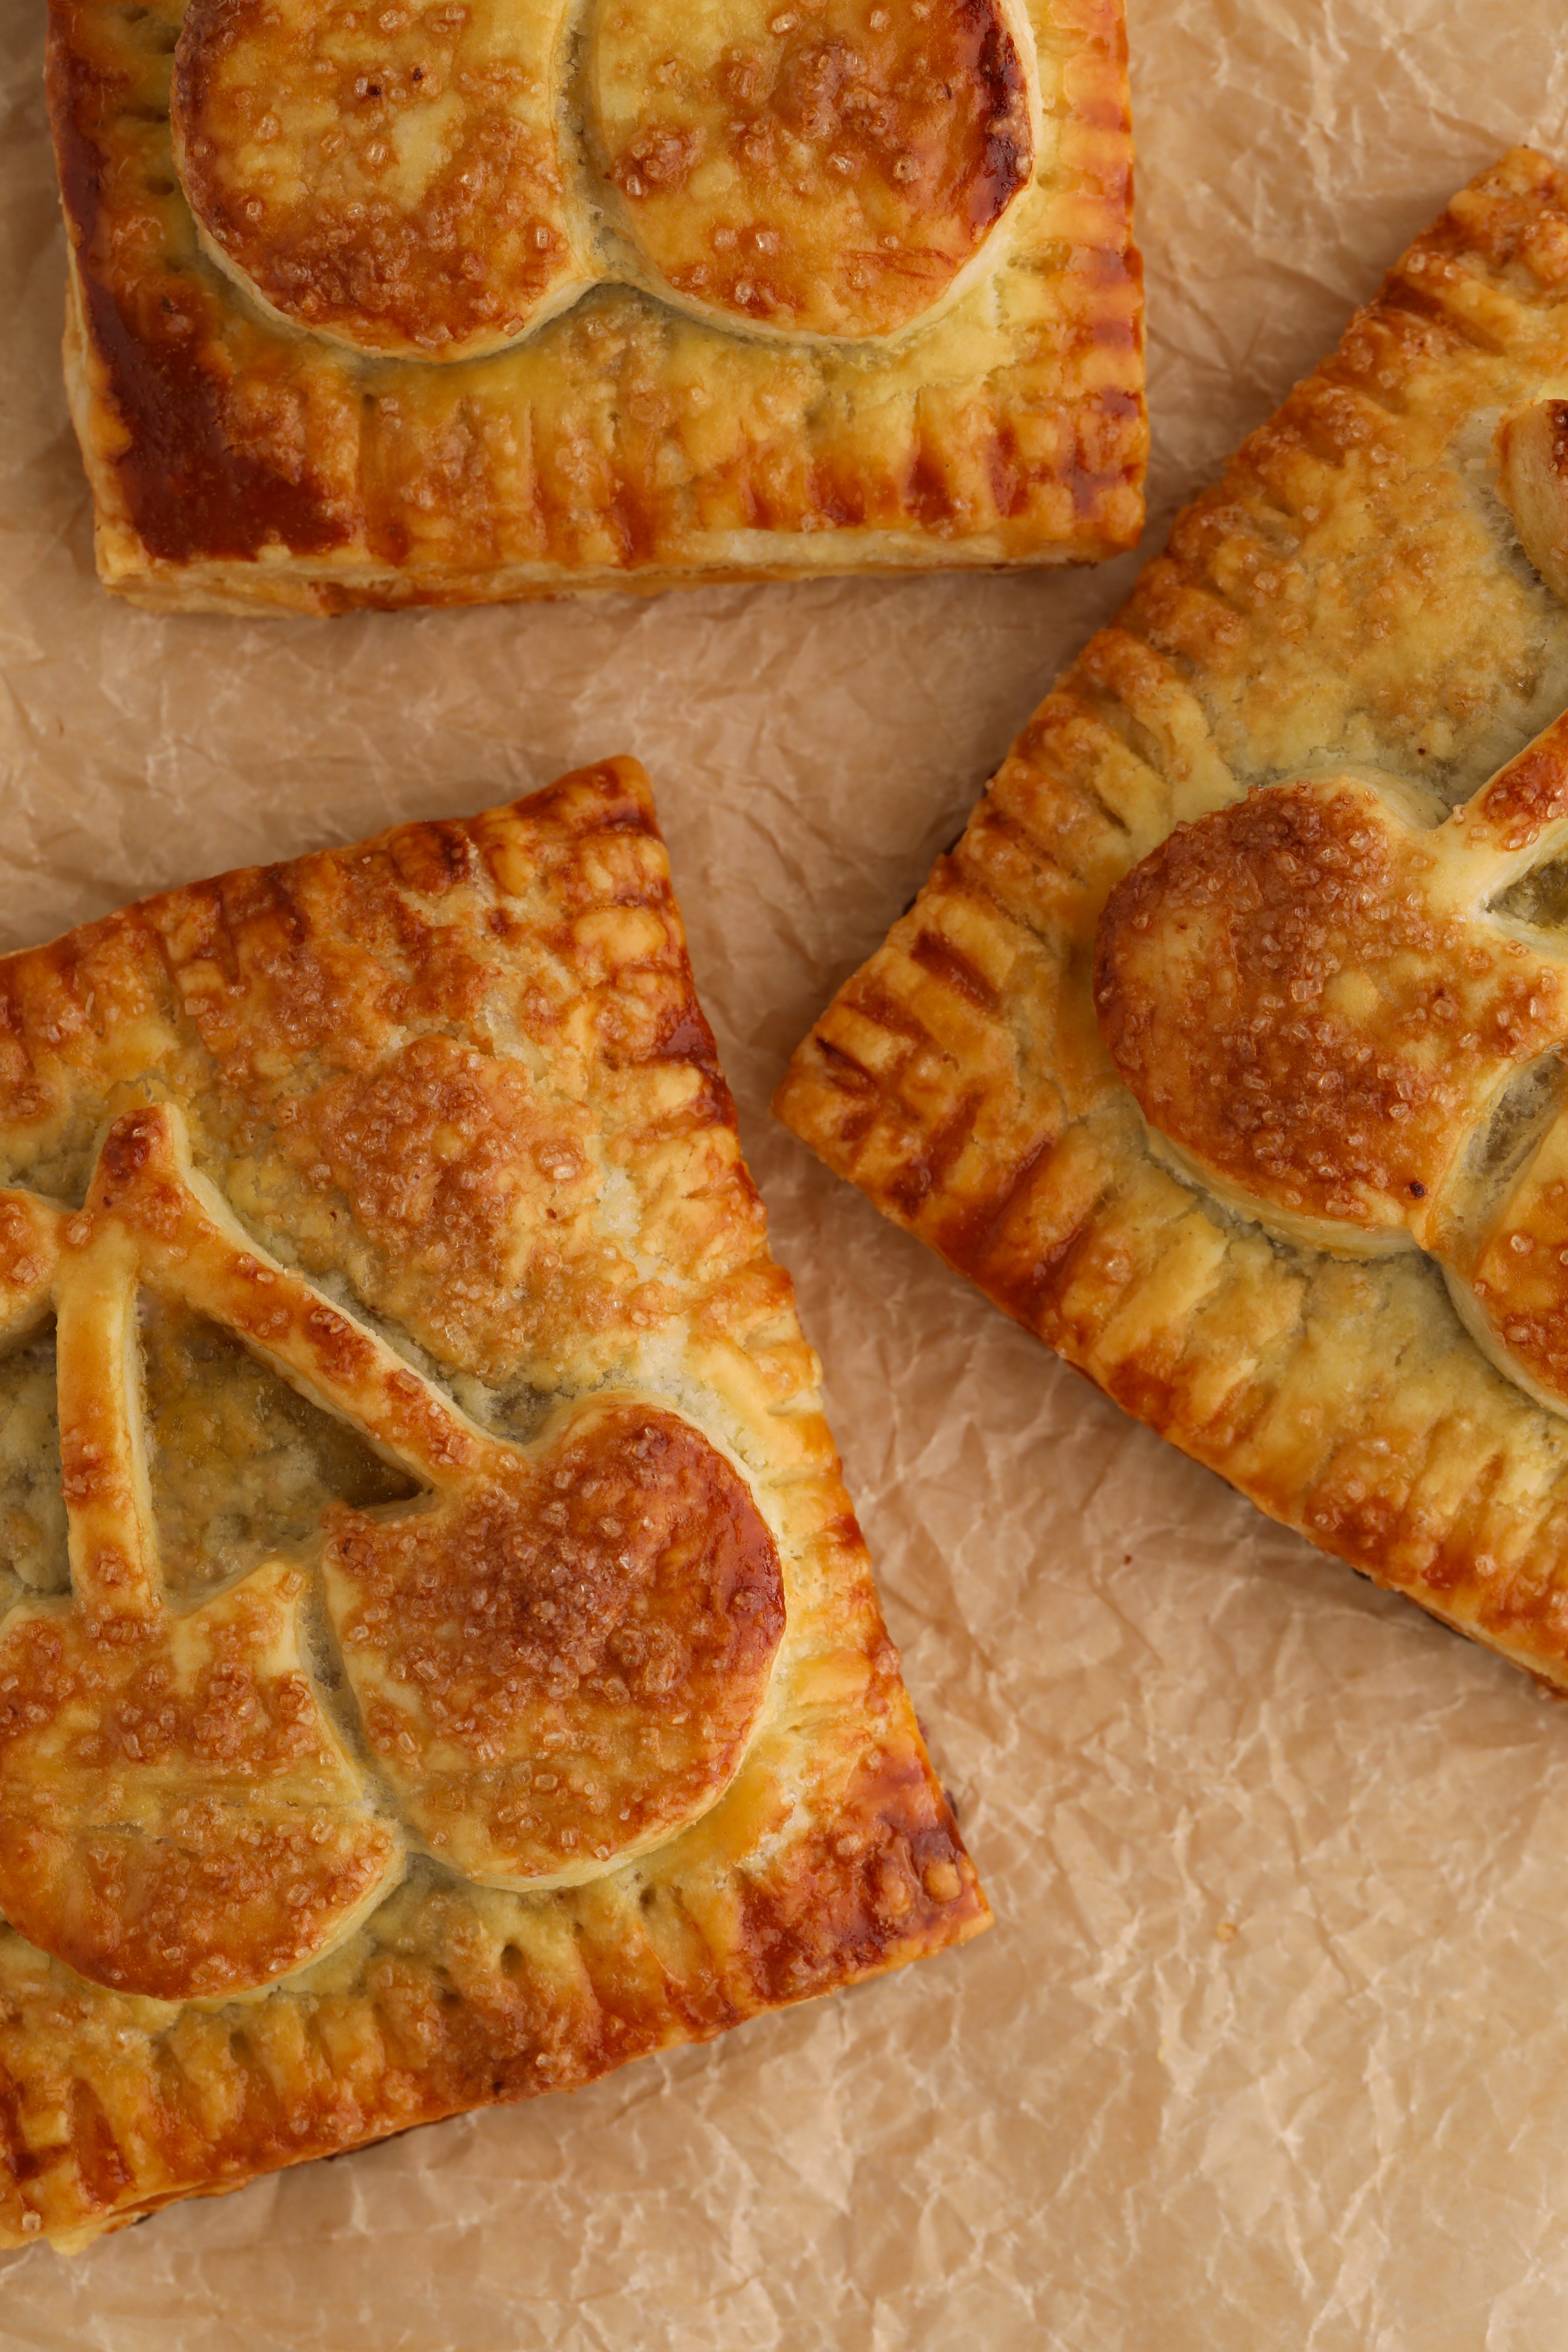
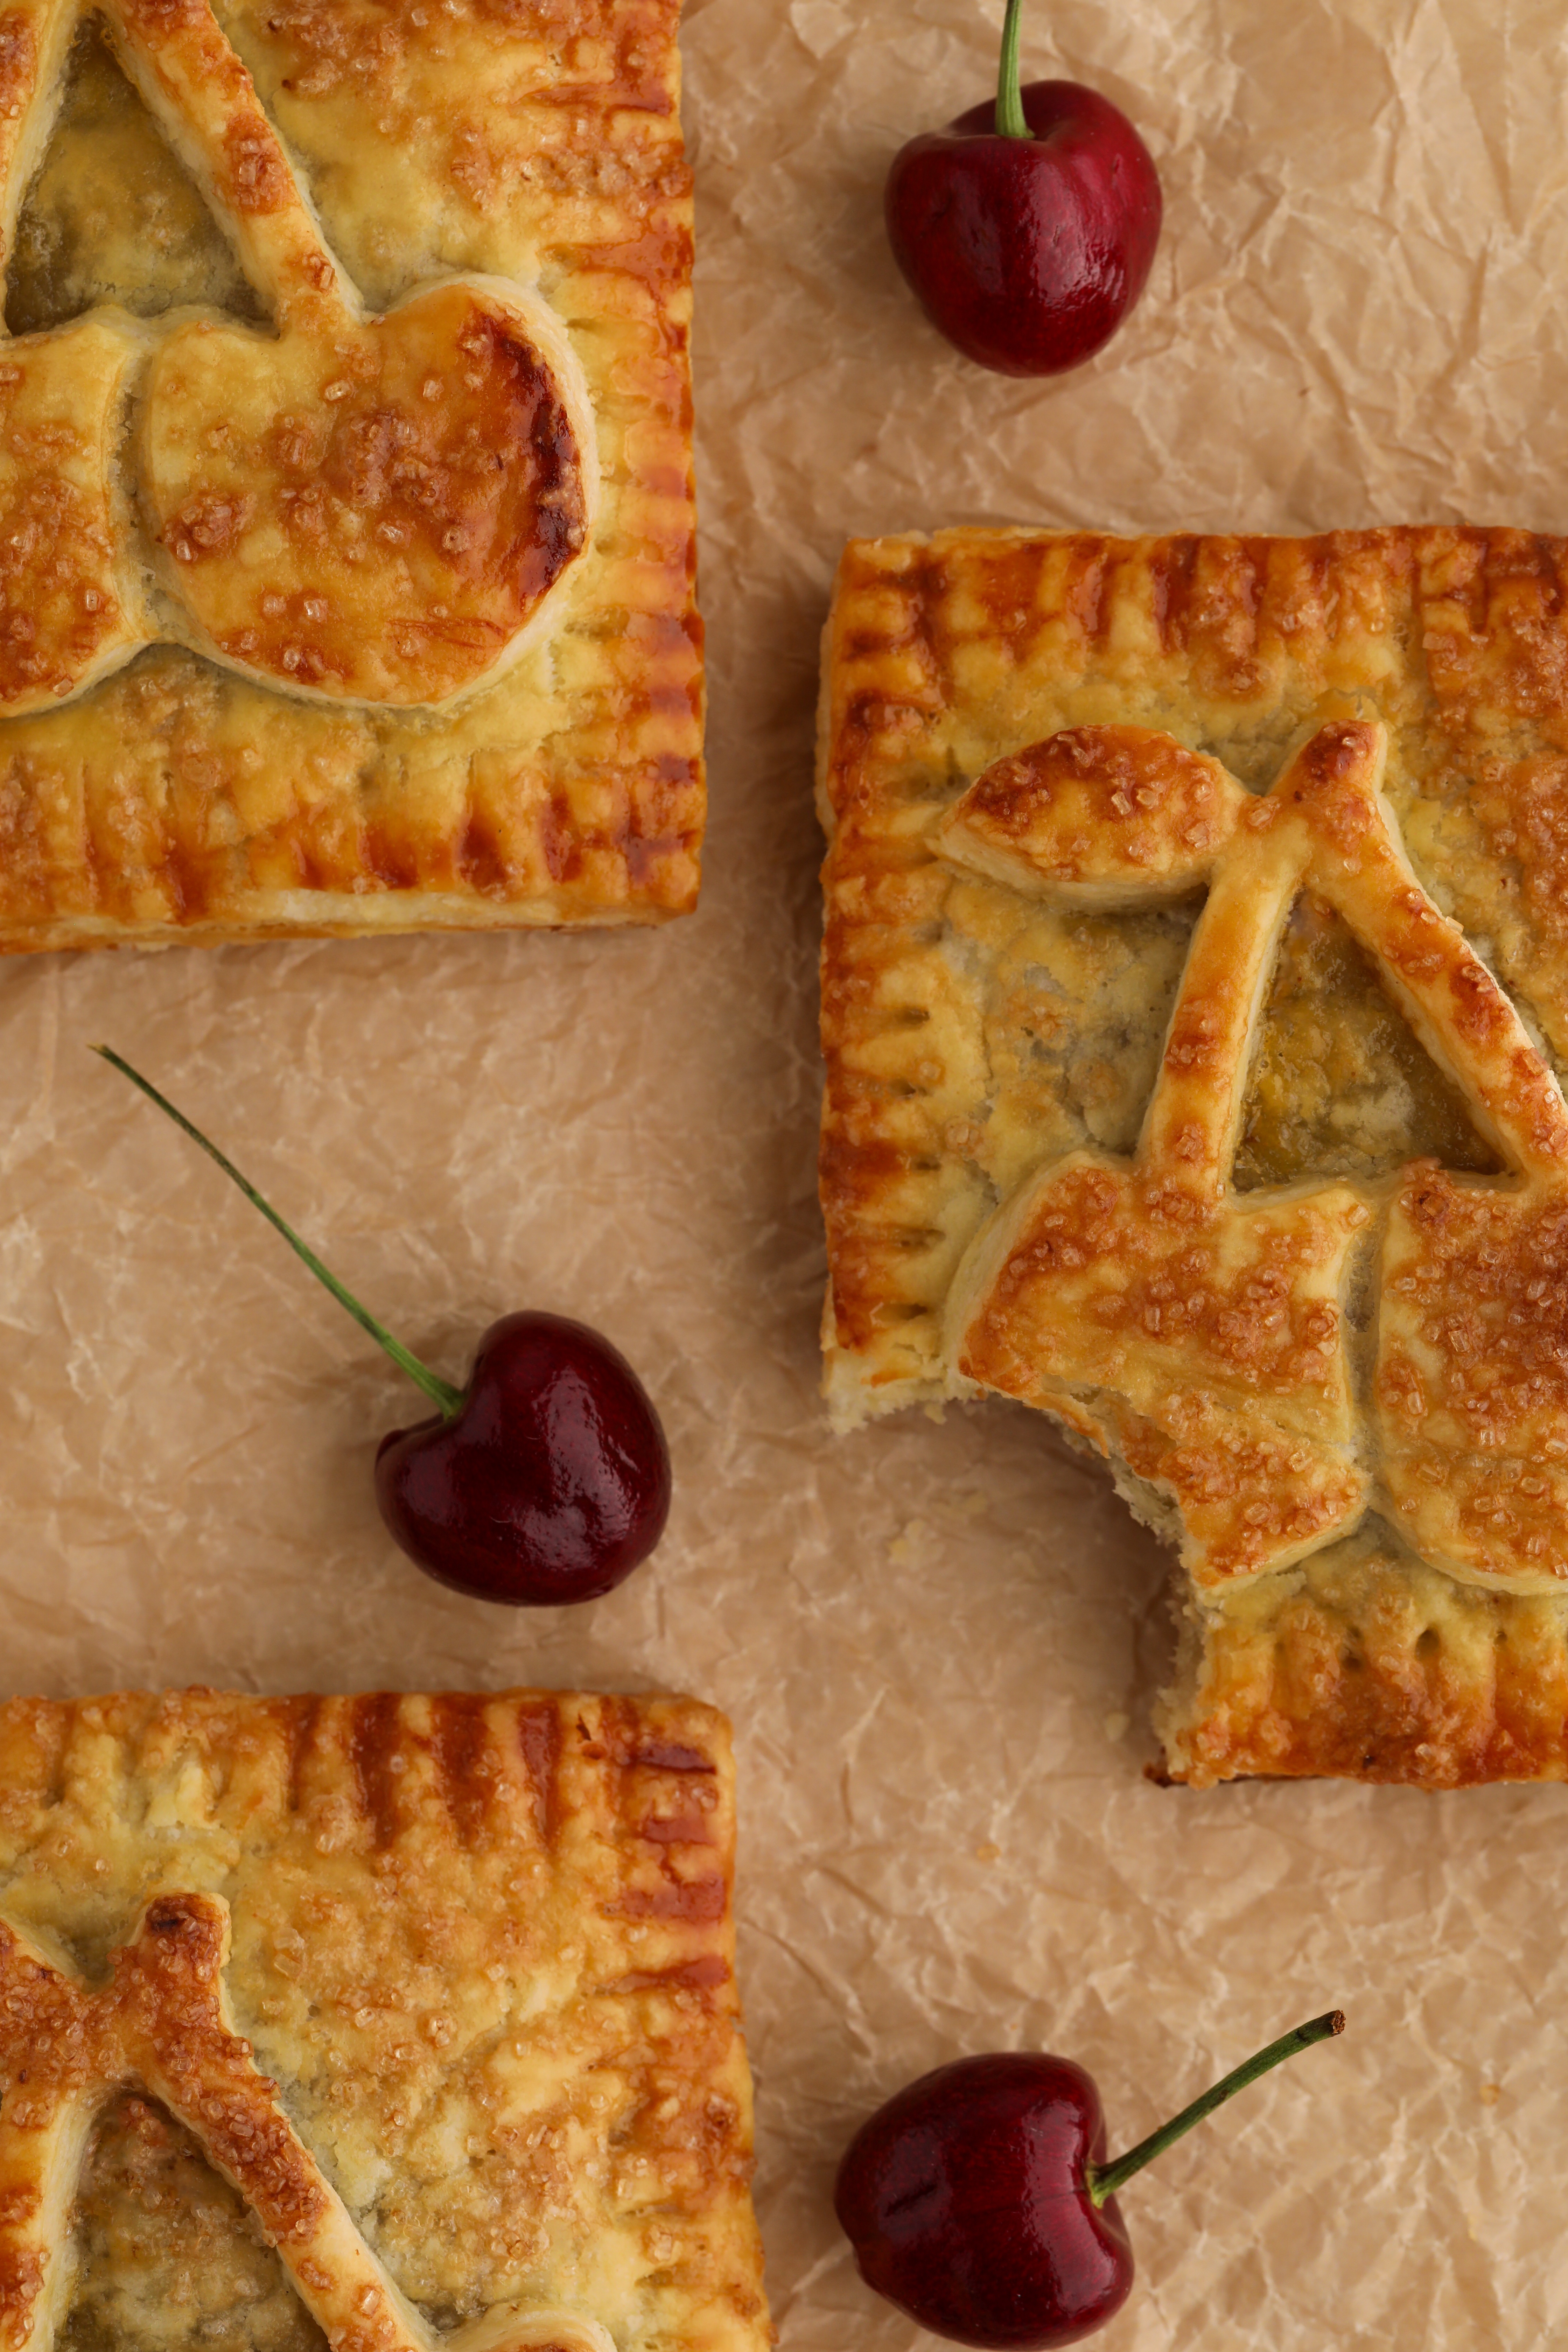
These Cherry Hand Pies not only have a sweet cherry filling and flaky pie crust, but also have the perfect cherry design on the outside to make them extra fun. The best part is you don’t need any kind of cookie cutter for the cherry design since I’ve got a printable template for you!
A FEW NOTES BEFORE WE GET STARTED
- Chilled Butter:
- It’s crucial that your butter is very cold. If at any point it or your dough becomes too warm to work with, make sure to place it in the fridge to chill and firm back up before working with further.
- Measuring Your Ingredients:
- I strongly encourage that you use a kitchen scale to measure your ingredients and ensure that you have the most accurate measurements possible.
- However, if you don’t have a scale on hand and will be using cup measurements, make sure to use the “spoon and sweep” method when measuring to avoid packing in too much of any dry ingredient.
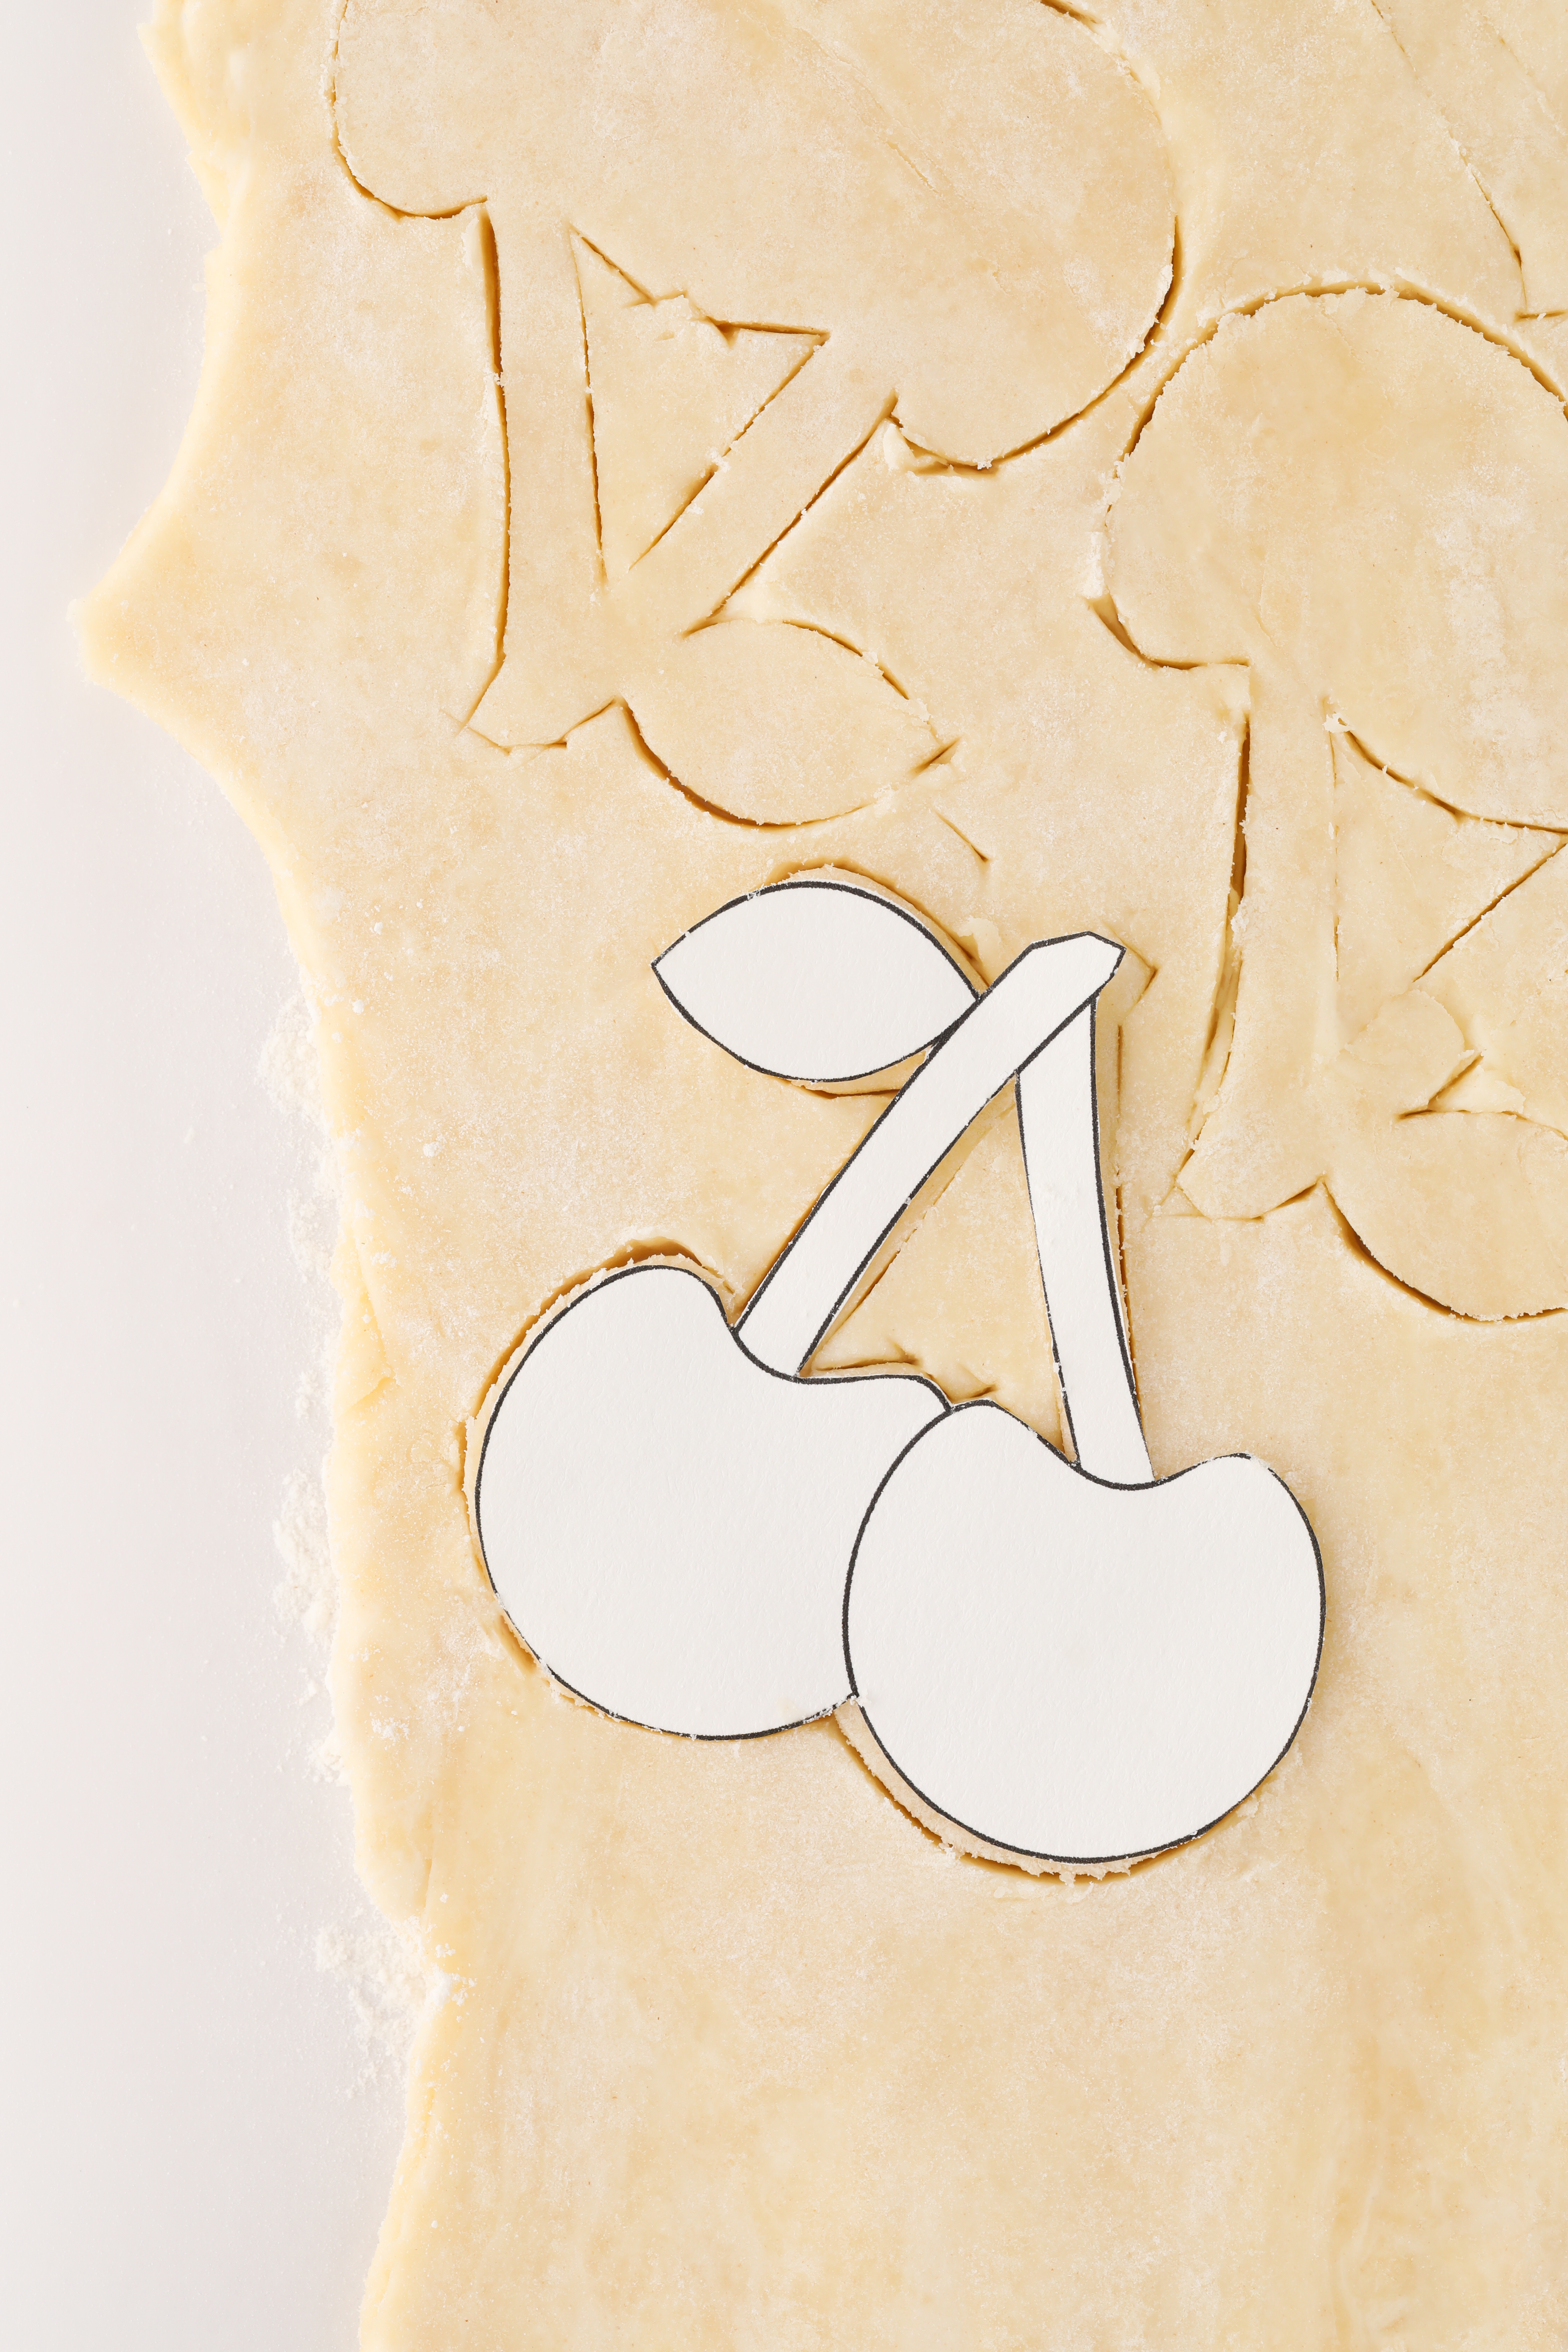
First start off by printing and cutting out my cherry template. It’s best to print it on cardstock so it is sturdy enough to work with.
Marisa Bakes Cherry Template
Now let’s get started on that dough! Once your oven is preheated to 375º F, combine the flour, sugar, and salt in a large bowl before carefully blending in the cold butter with your hands or a pastry blender.
You want to do this until the butter is about the size of peas. If it becomes tricky to work with at any point or if it’s a really hot day, pop the bowl back in the fridge or freezer for a few minutes to help the butter firm back up. Add ice cold water and stir together until it begins to form into a dough. Pat the dough into a disk, wrap it in plastic, and chill it in the fridge while you prepare your filling.
Grab a nonstick pan and add your cherries, sugar, and cornstarch. Stir together all three ingredients over medium heat until the mixture begins to thicken and the cherries start to burst. You can also smoosh down the cherries with the back of the spoon. Set this aside.
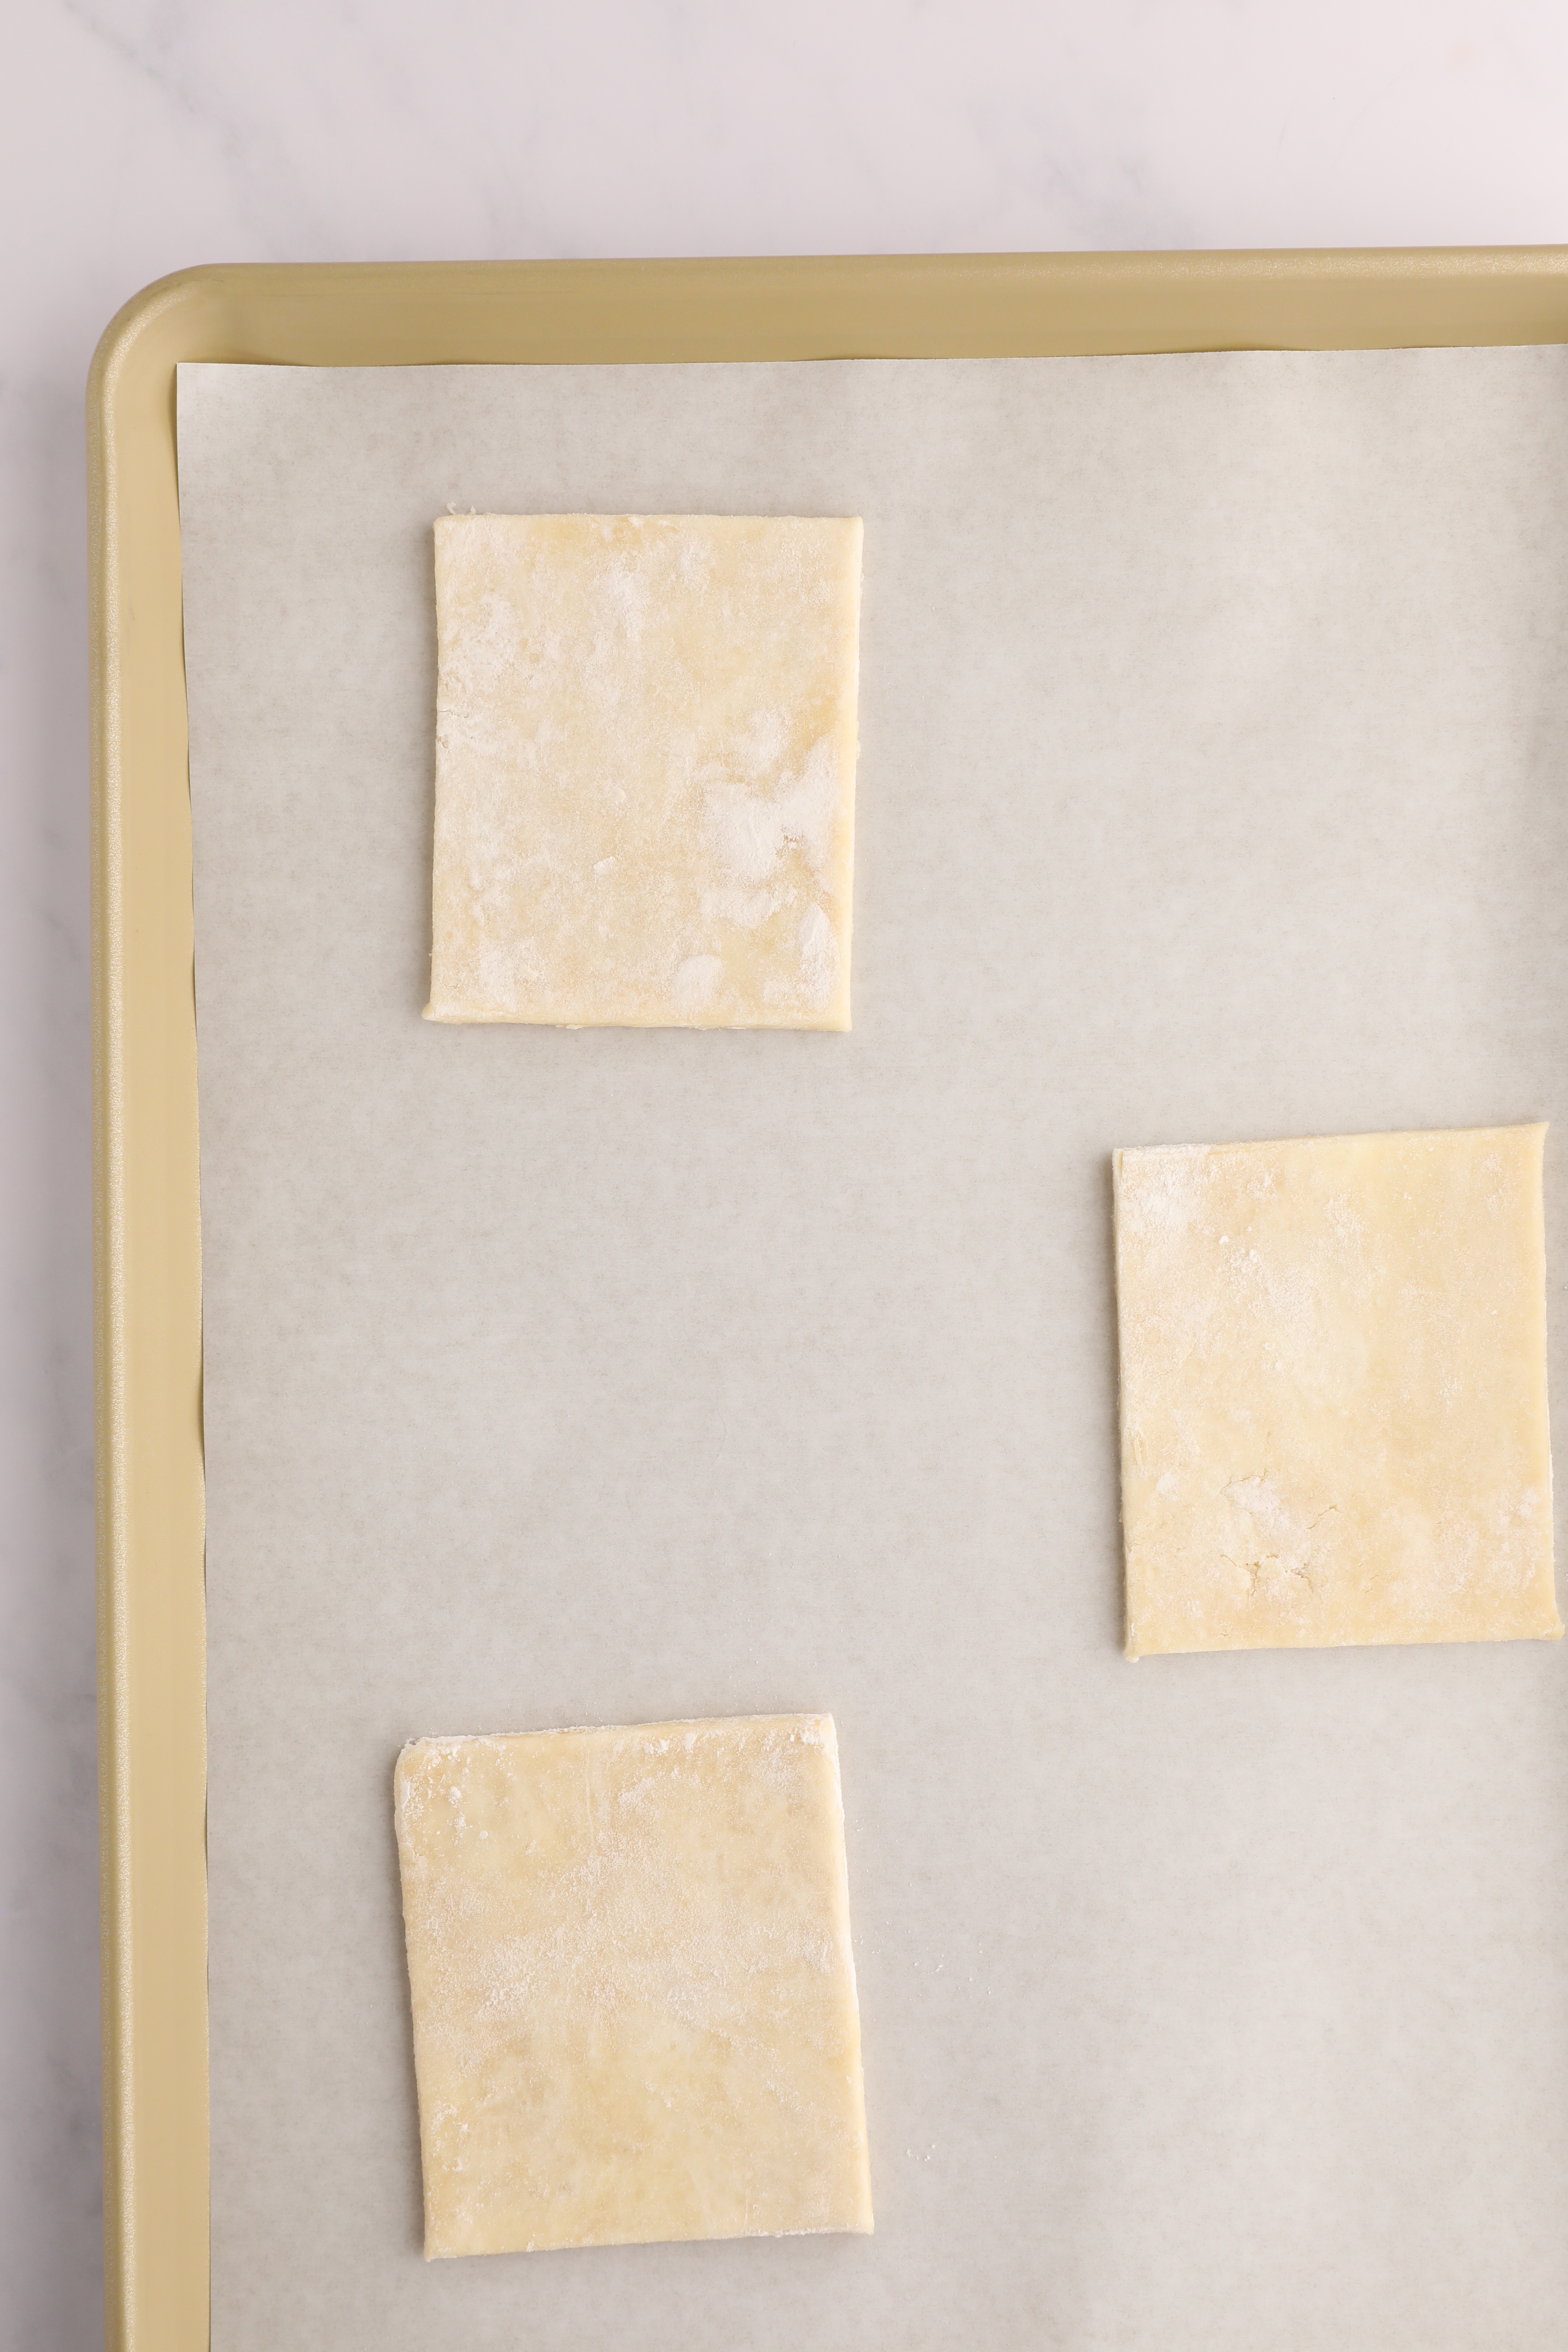
Next, roll the dough out onto a lightly floured surface until it is just larger than 7” by 8”. Using a ruler and a pastry roller, cut the dough to 7” by 8”. Then cut that large rectangle into half one way, turn it, and cut it into half again so you have four rectangles that are 3 ½” by 4”.
Place the four rectangles on a parchment lined baking sheet and place back into the fridge to chill. Roll out the remaining dough again to cut out two more 3 ½ by 4 rectangles as well as the cherries.
Once you have cut out the last two rectangles, place the leftover rolled out dough in the freezer for 5-10 minutes. You want it to be really really cold when you cut out the cherries.
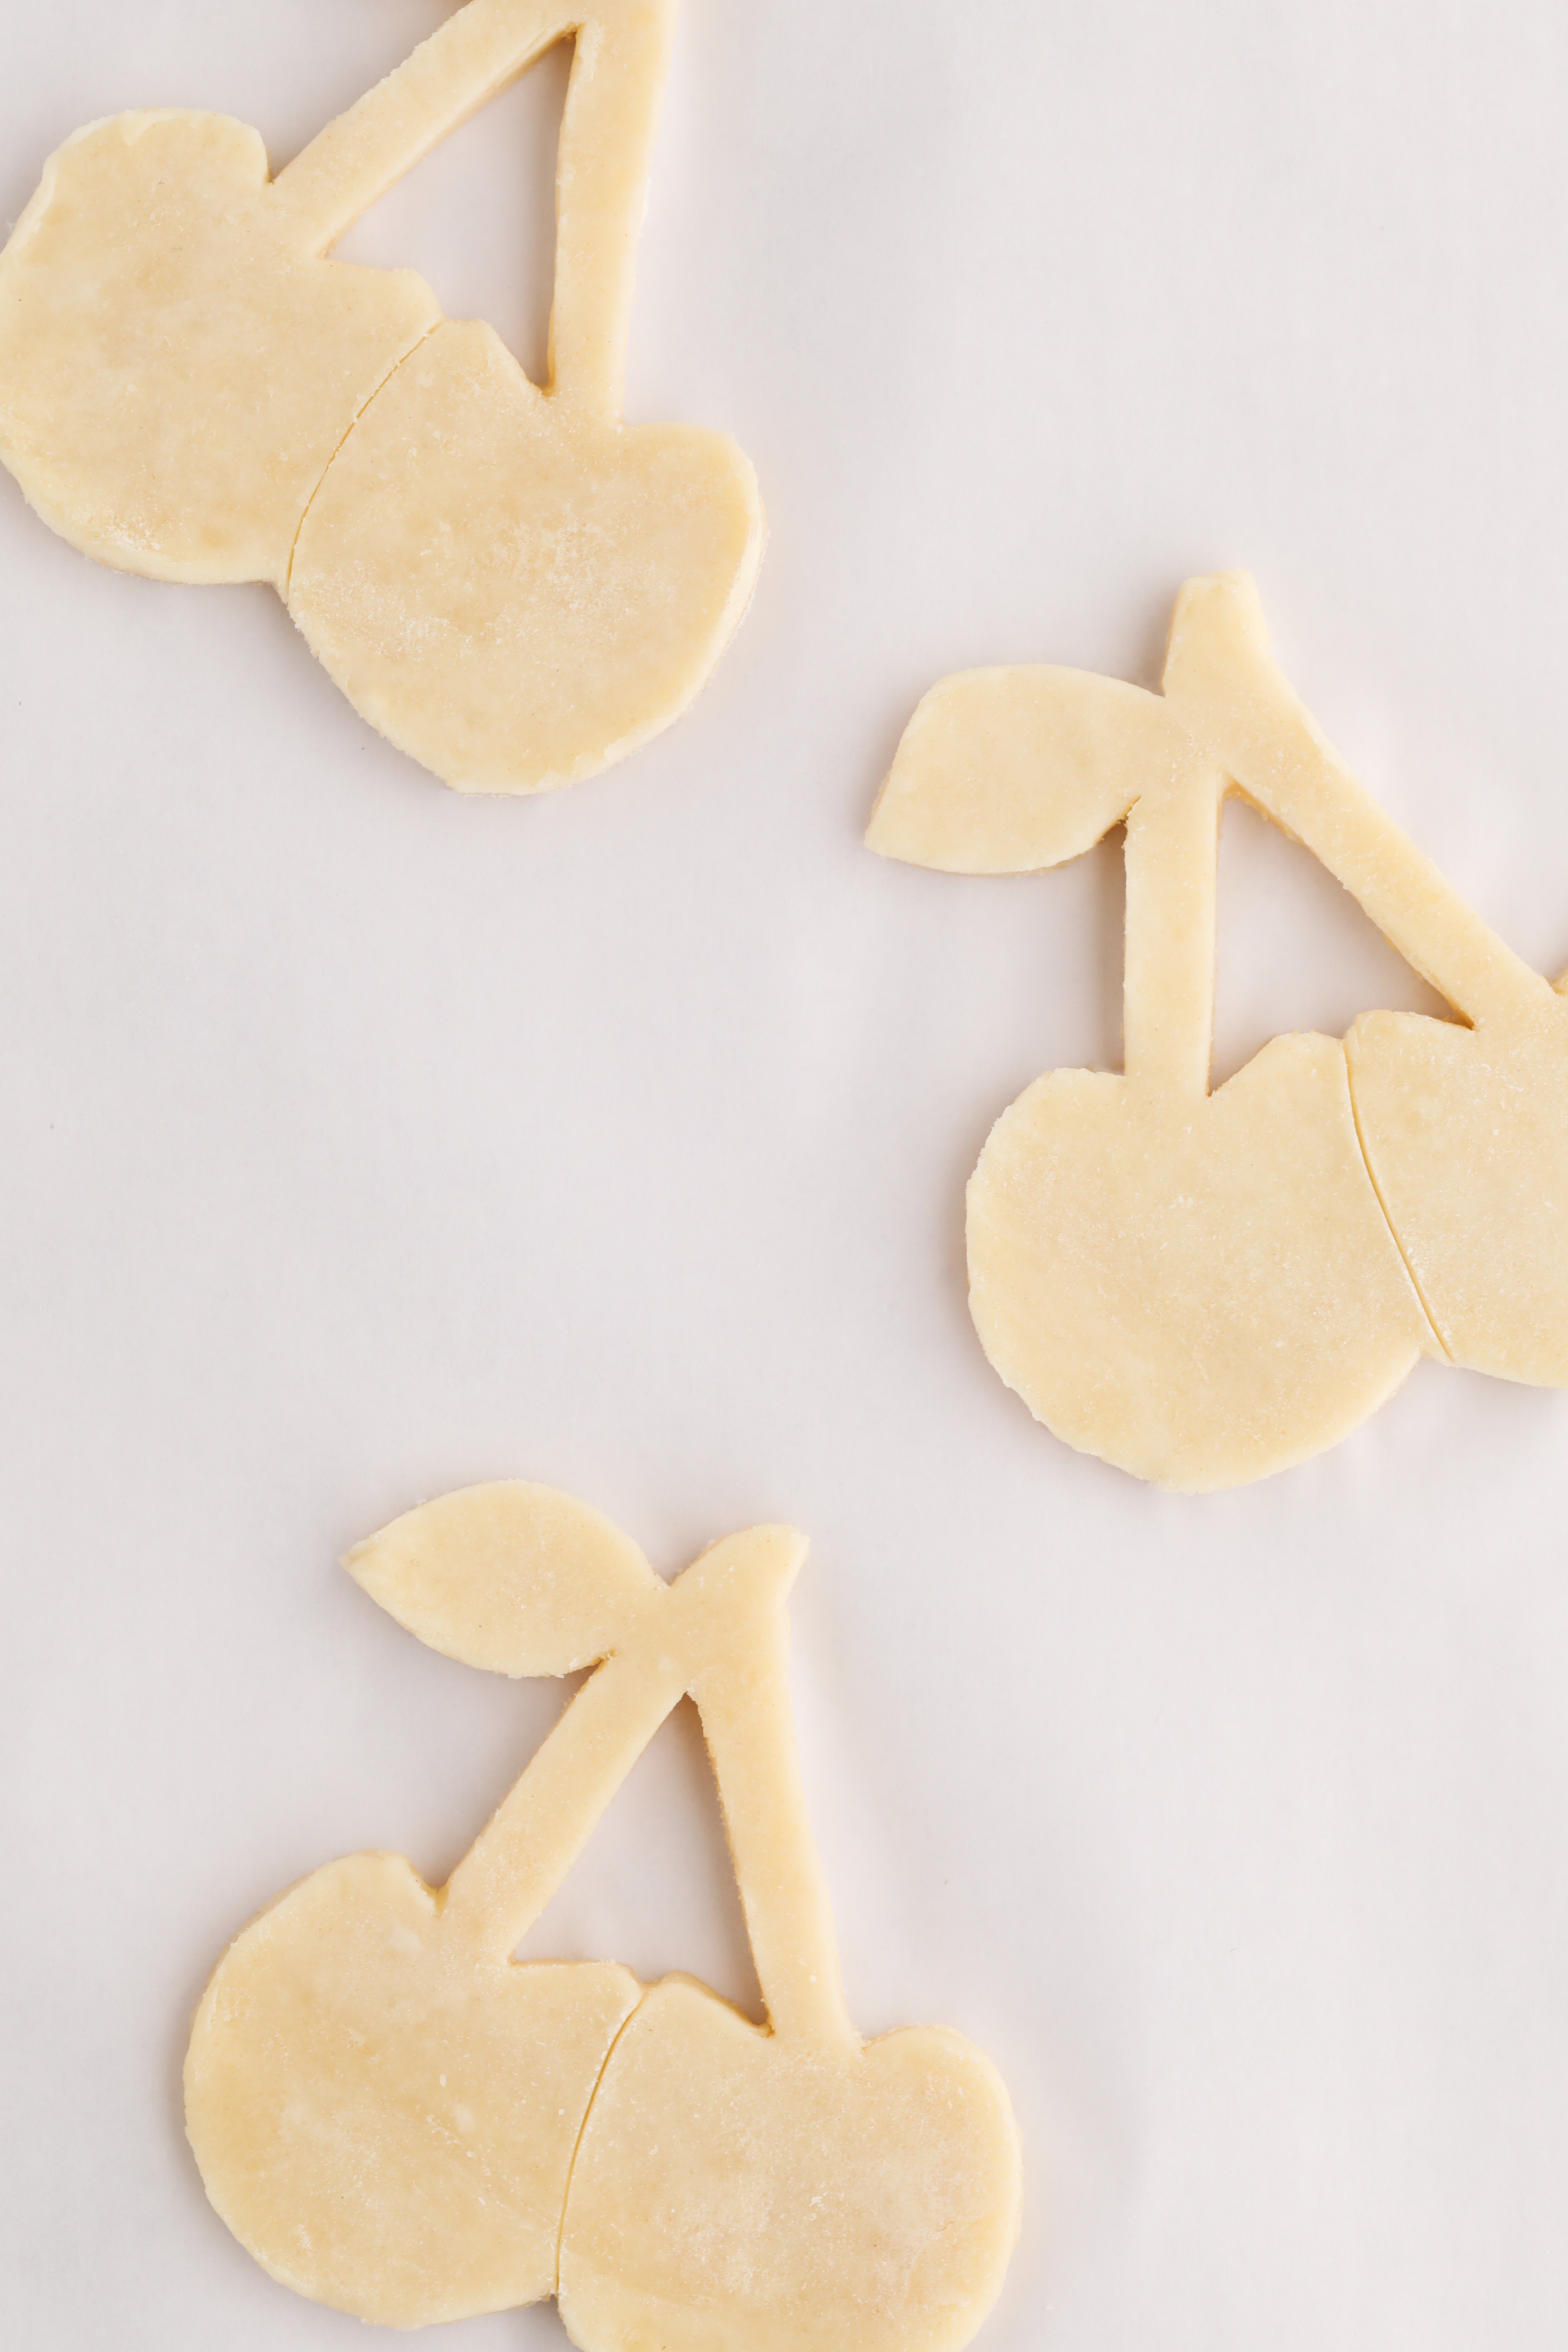
Once the dough is very cold, place the cherry template over the dough and carefully cut around it using a sharp pairing knife. Repeat this process until you have three cherries. Transfer each cherry to a parchment lined baking sheet and place them back into the freezer.
In a separate bowl, whisk together the egg and water to make your egg wash. Carefully spoon the cherry filling into the center of three of the rectangles, making sure to leave a border.
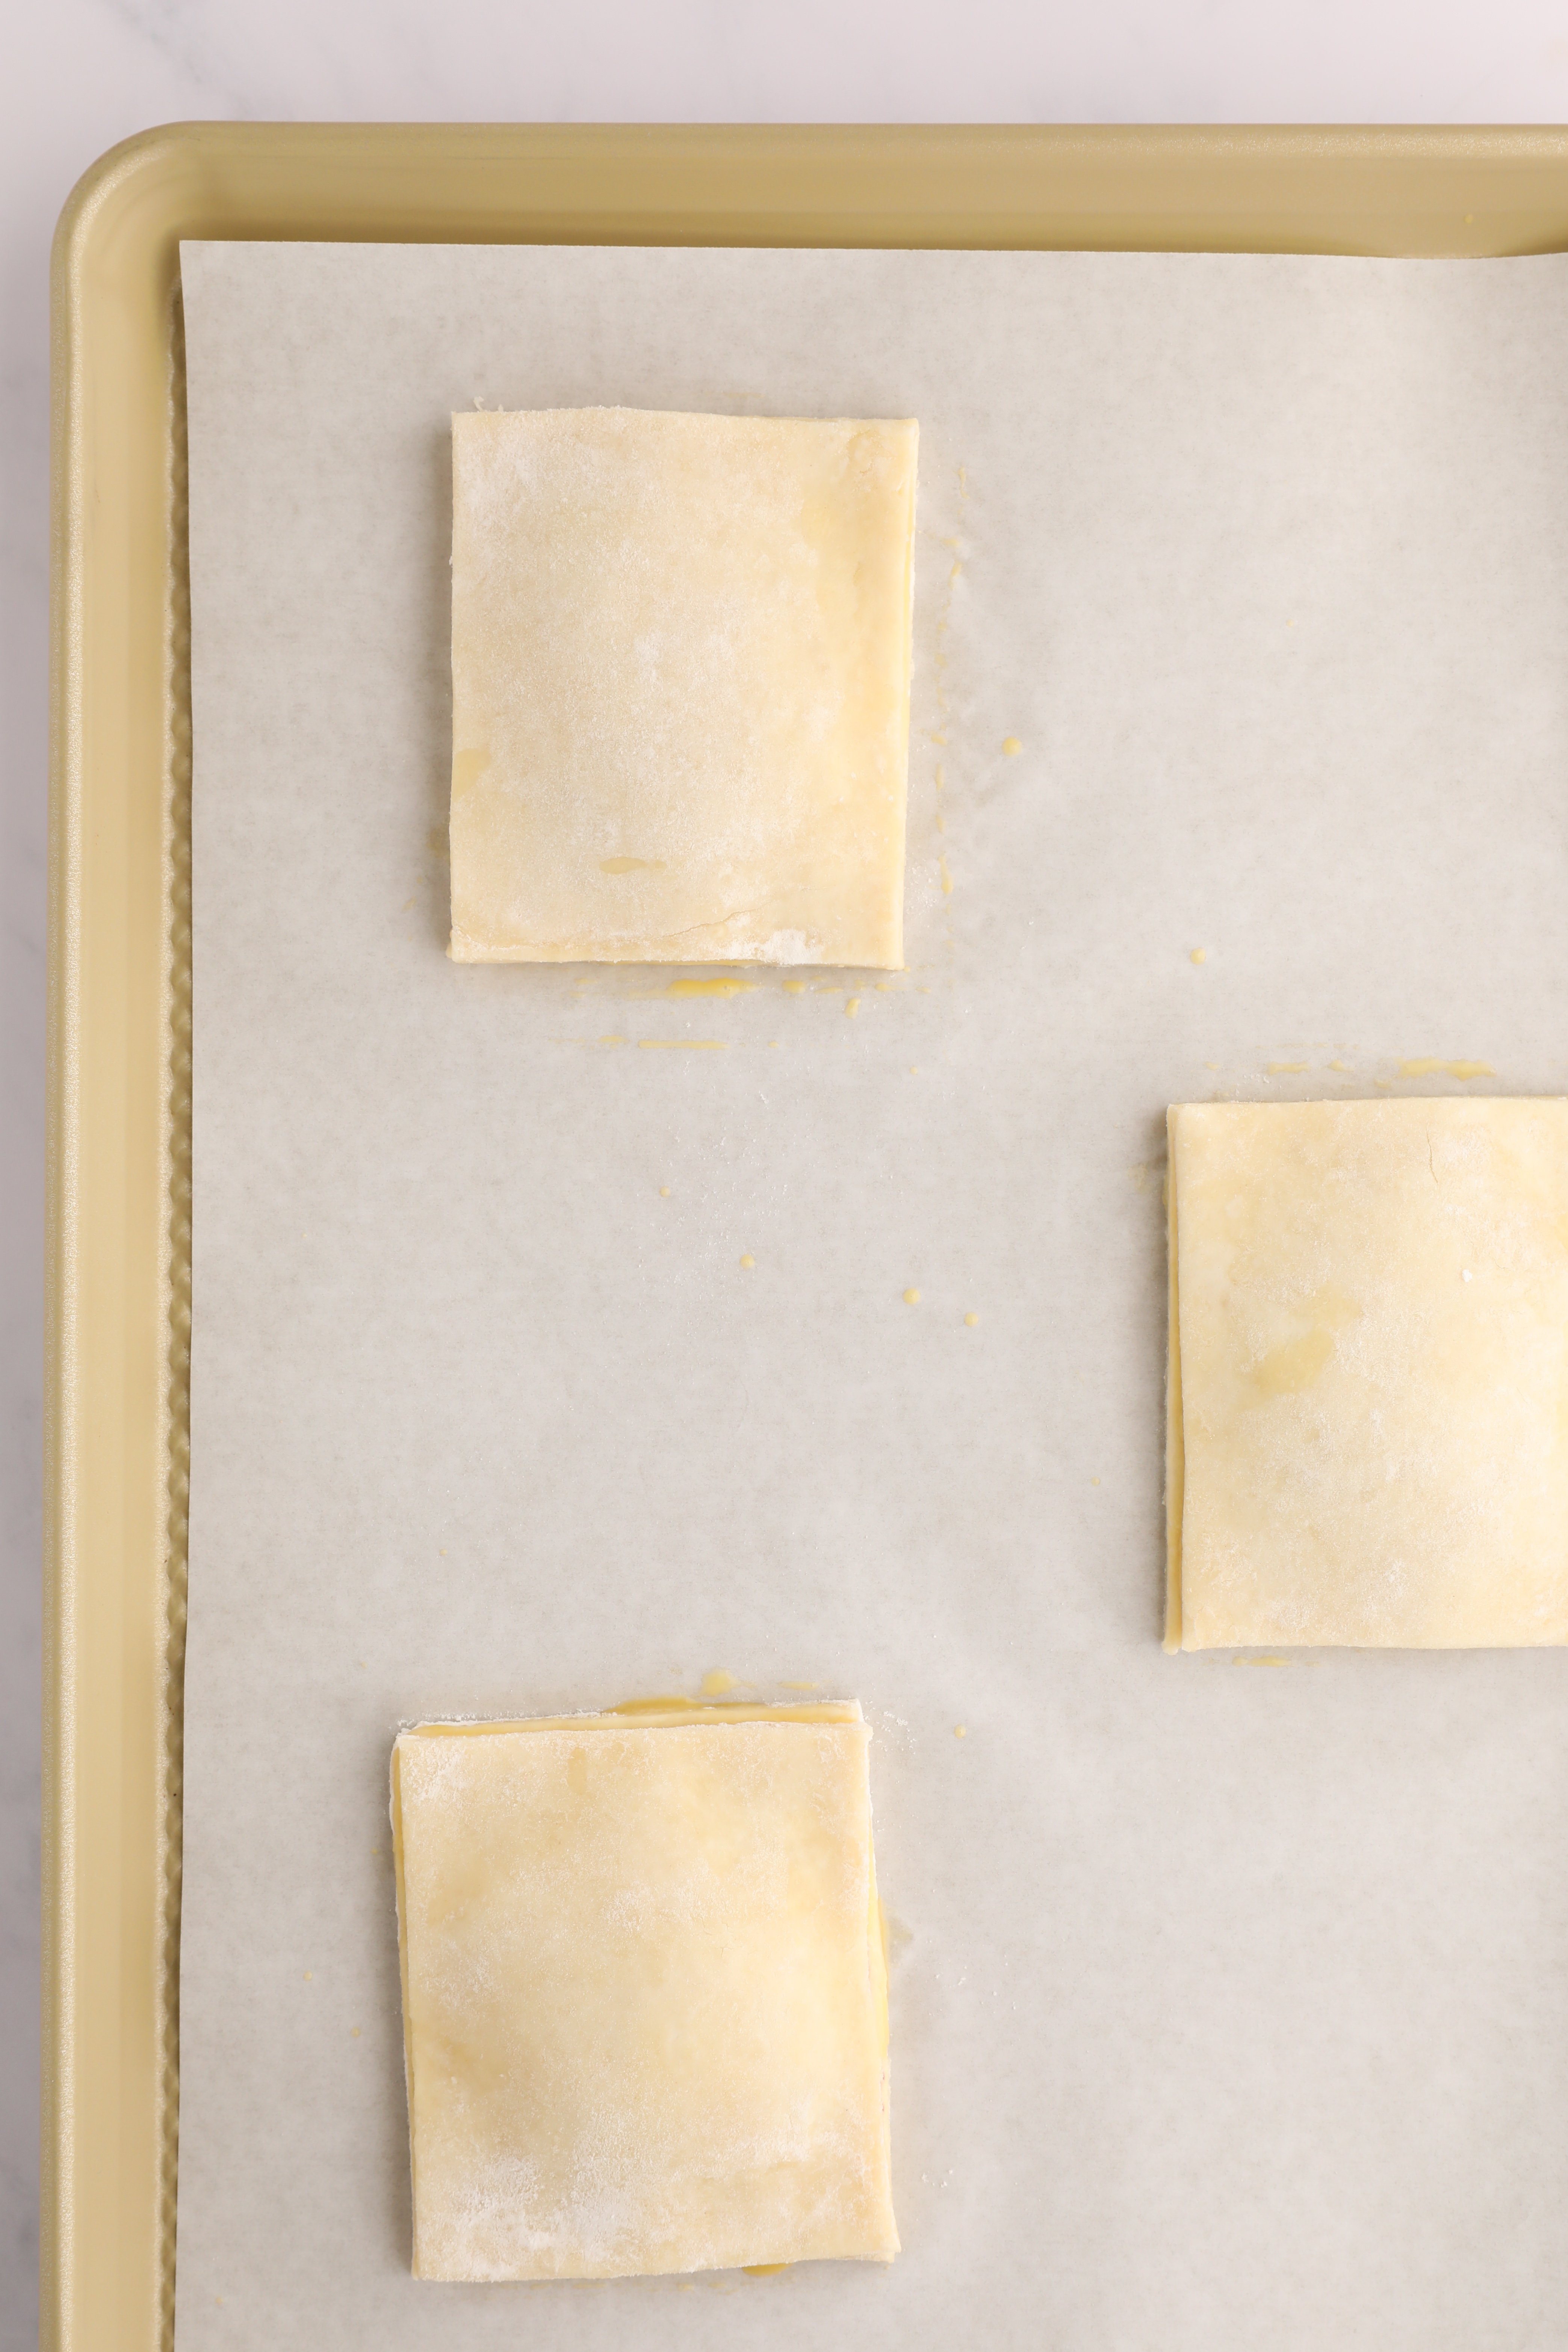
Brush the edges of the rectangles with egg wash and gently place another rectangle on top of each of them, carefully pressing down so that they adhere together. Place these back into the fridge.
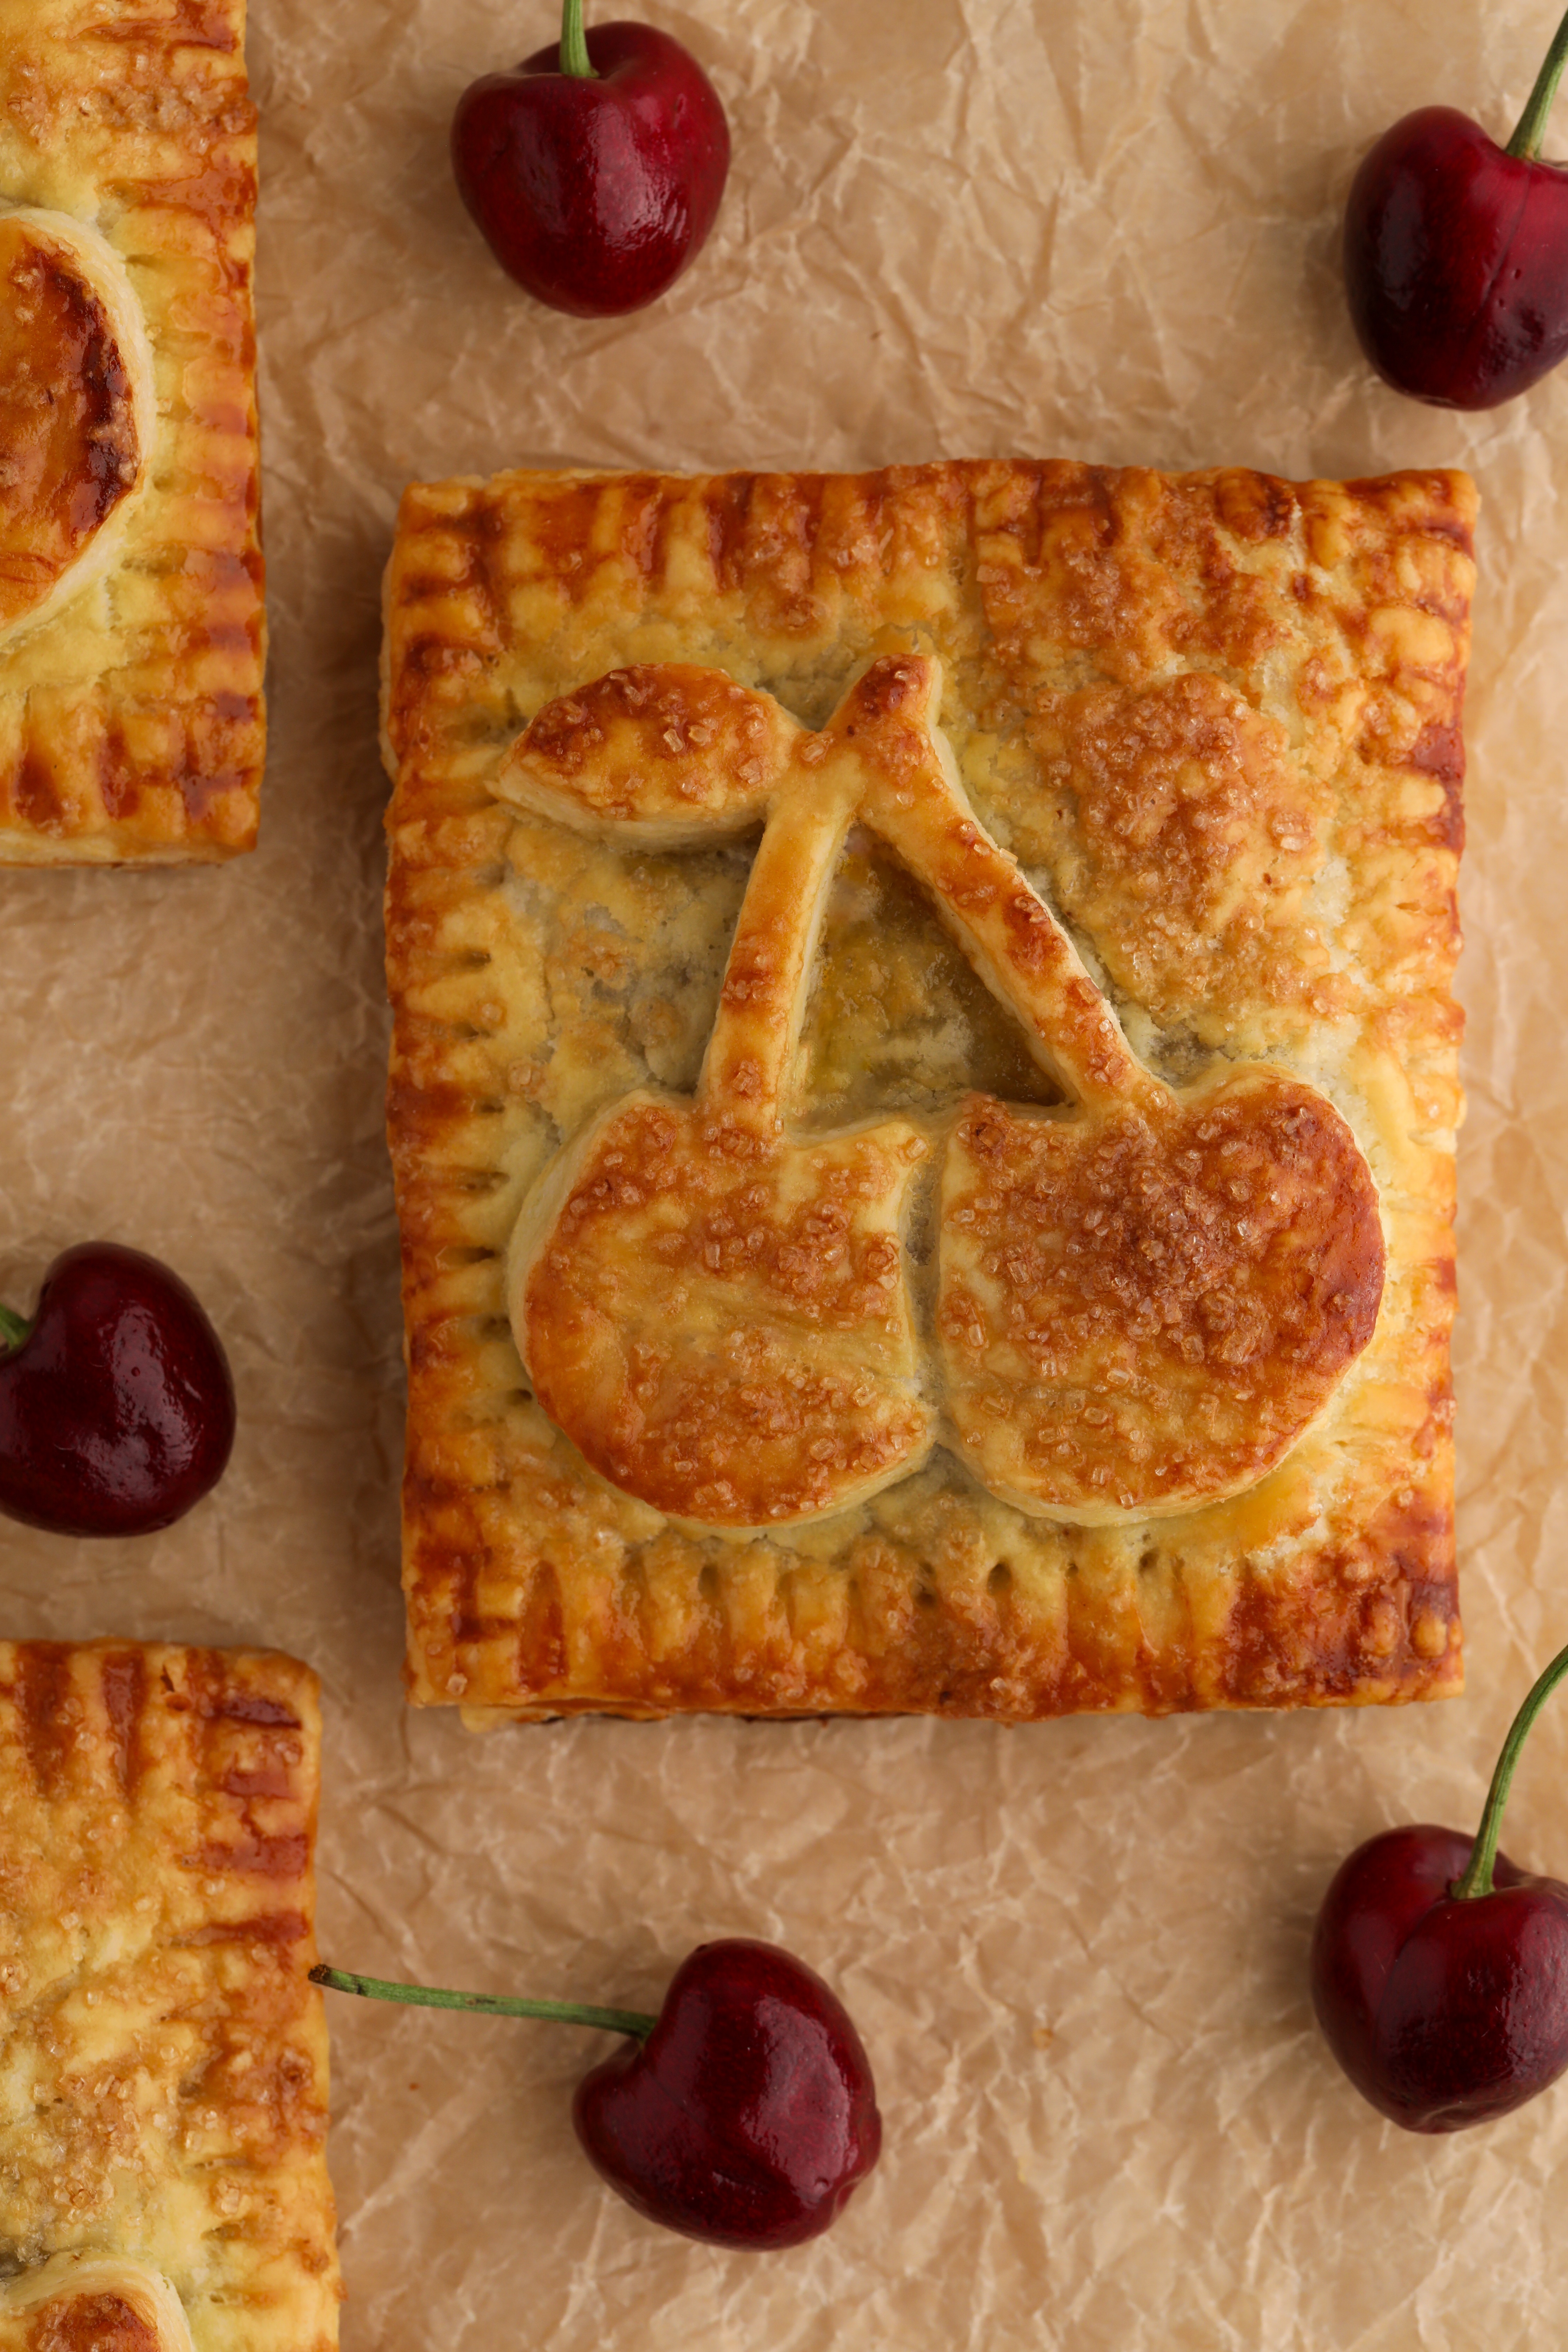
Clean up any extra edges on the cherry pie cut outs with a toothpick or knife so that they look as sharp as possible. Carefully use a knife to make a line outlining one of the cherries, but don’t cut all the way through.
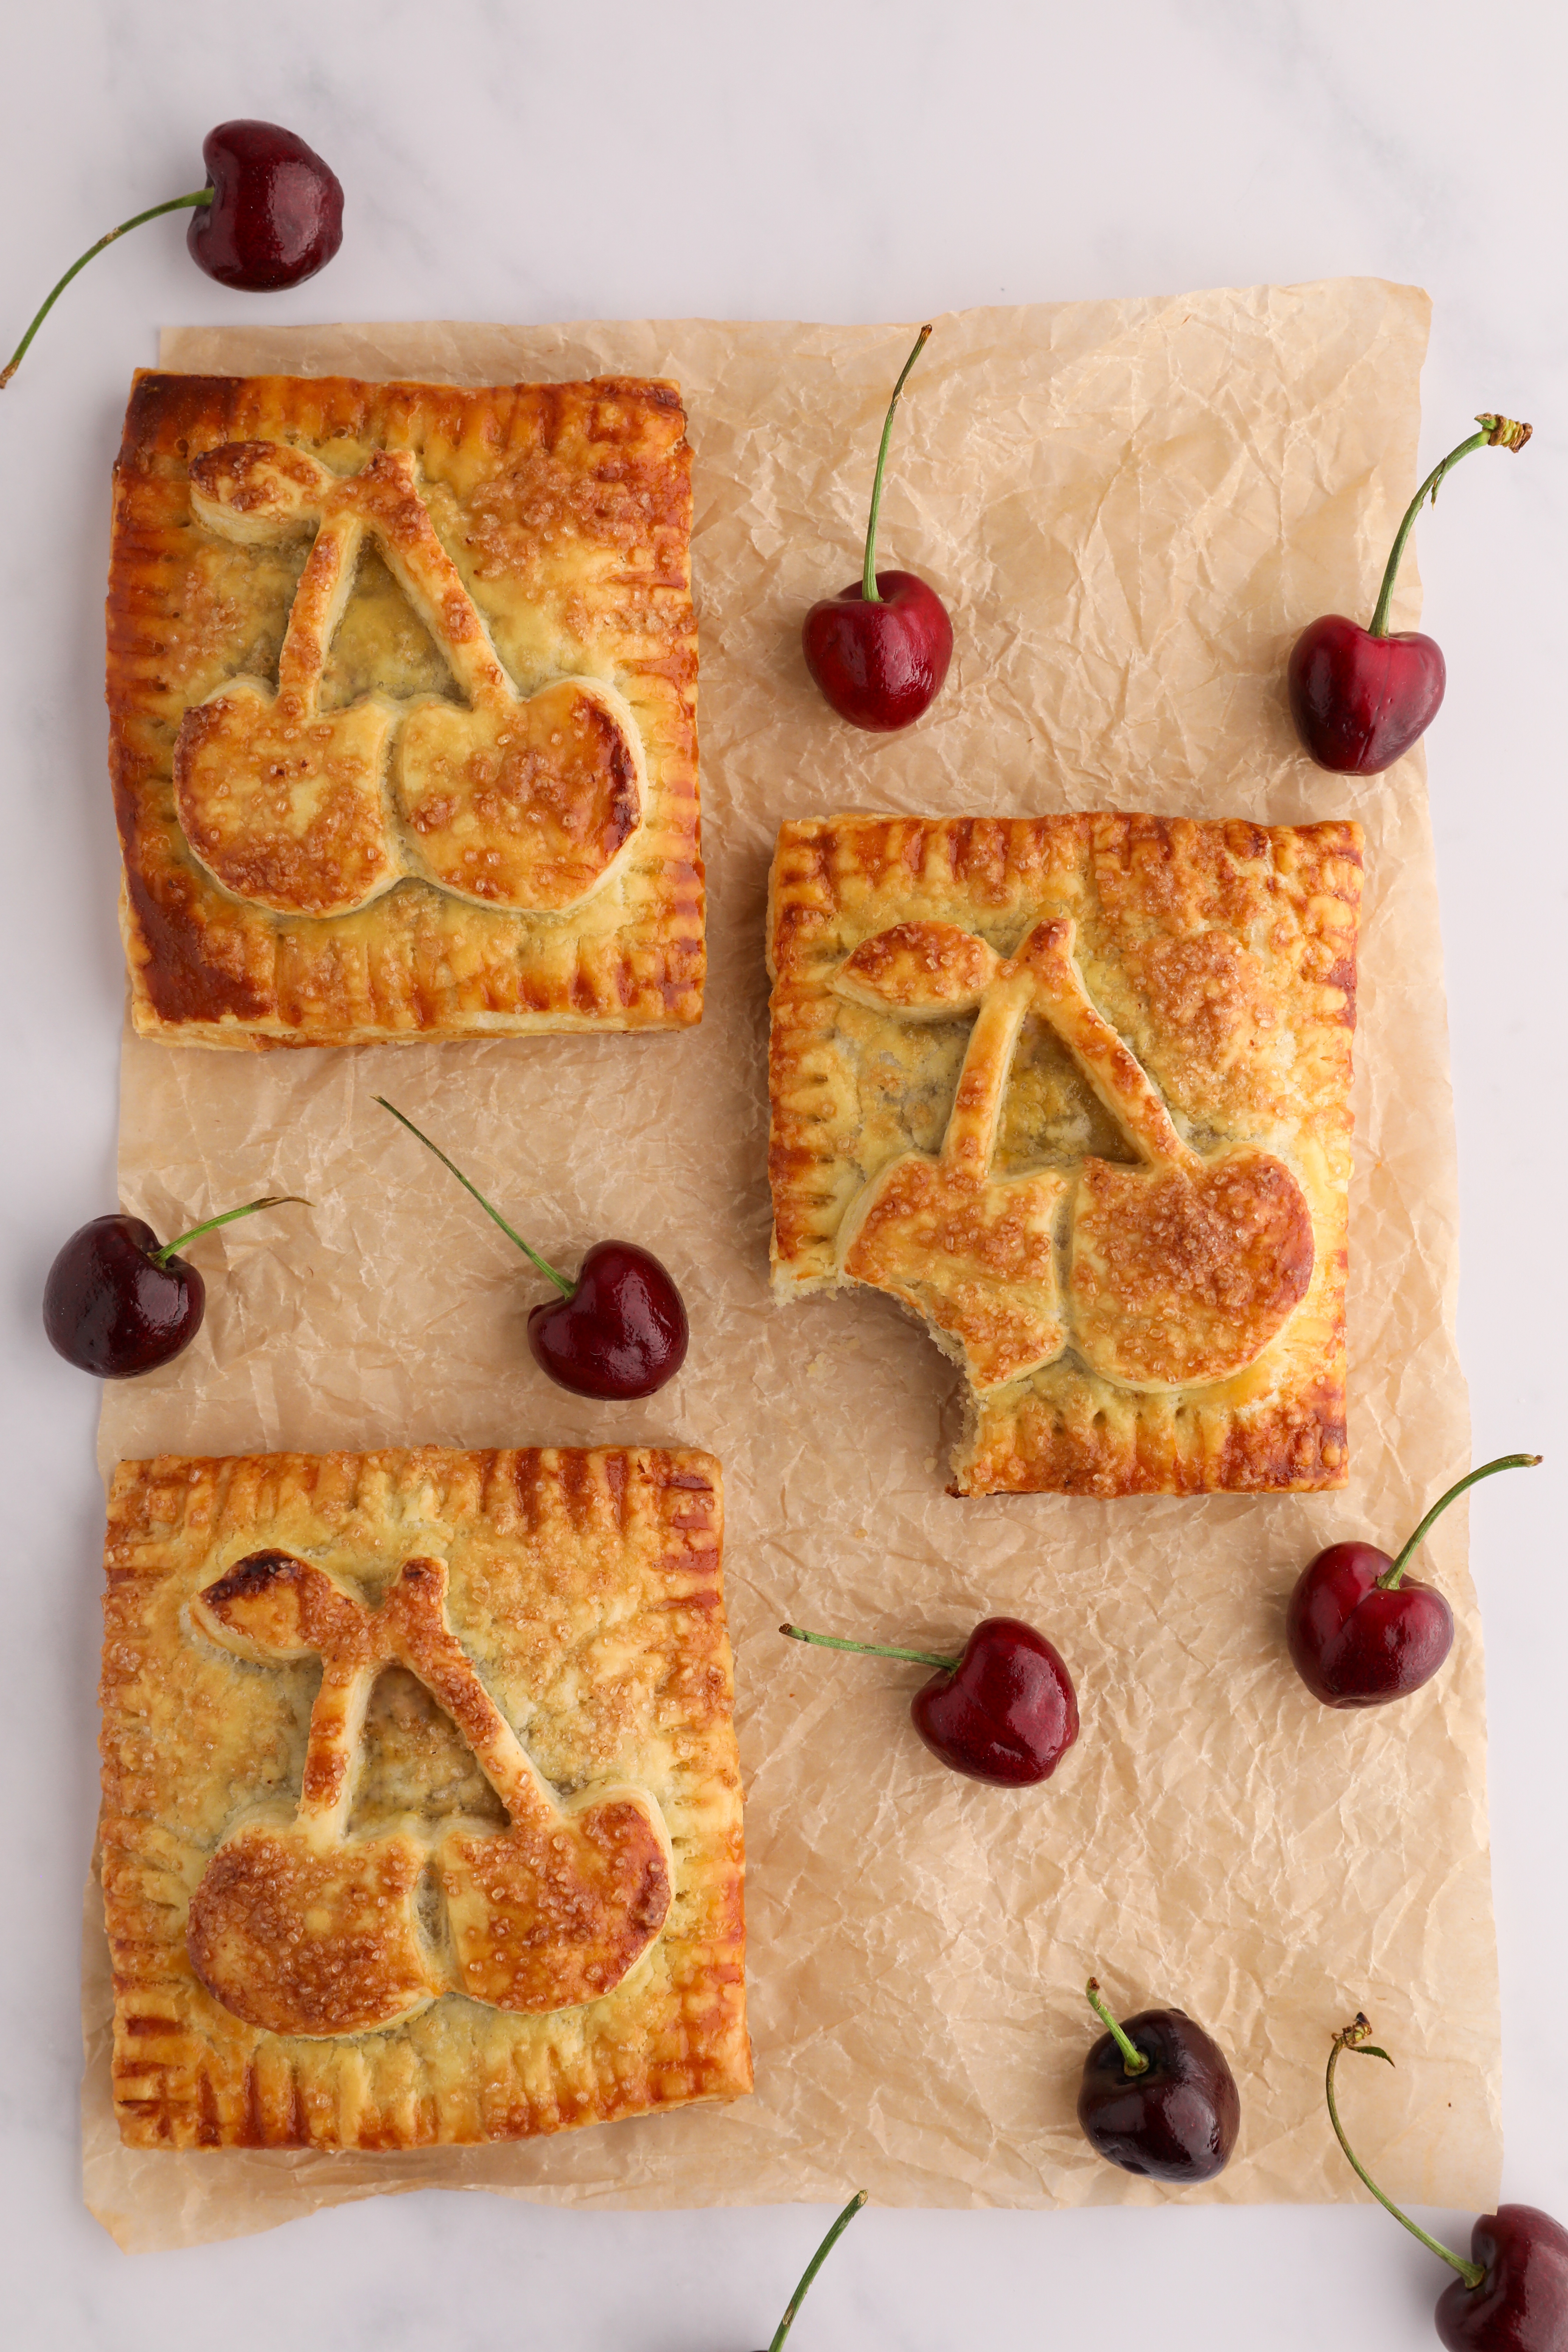
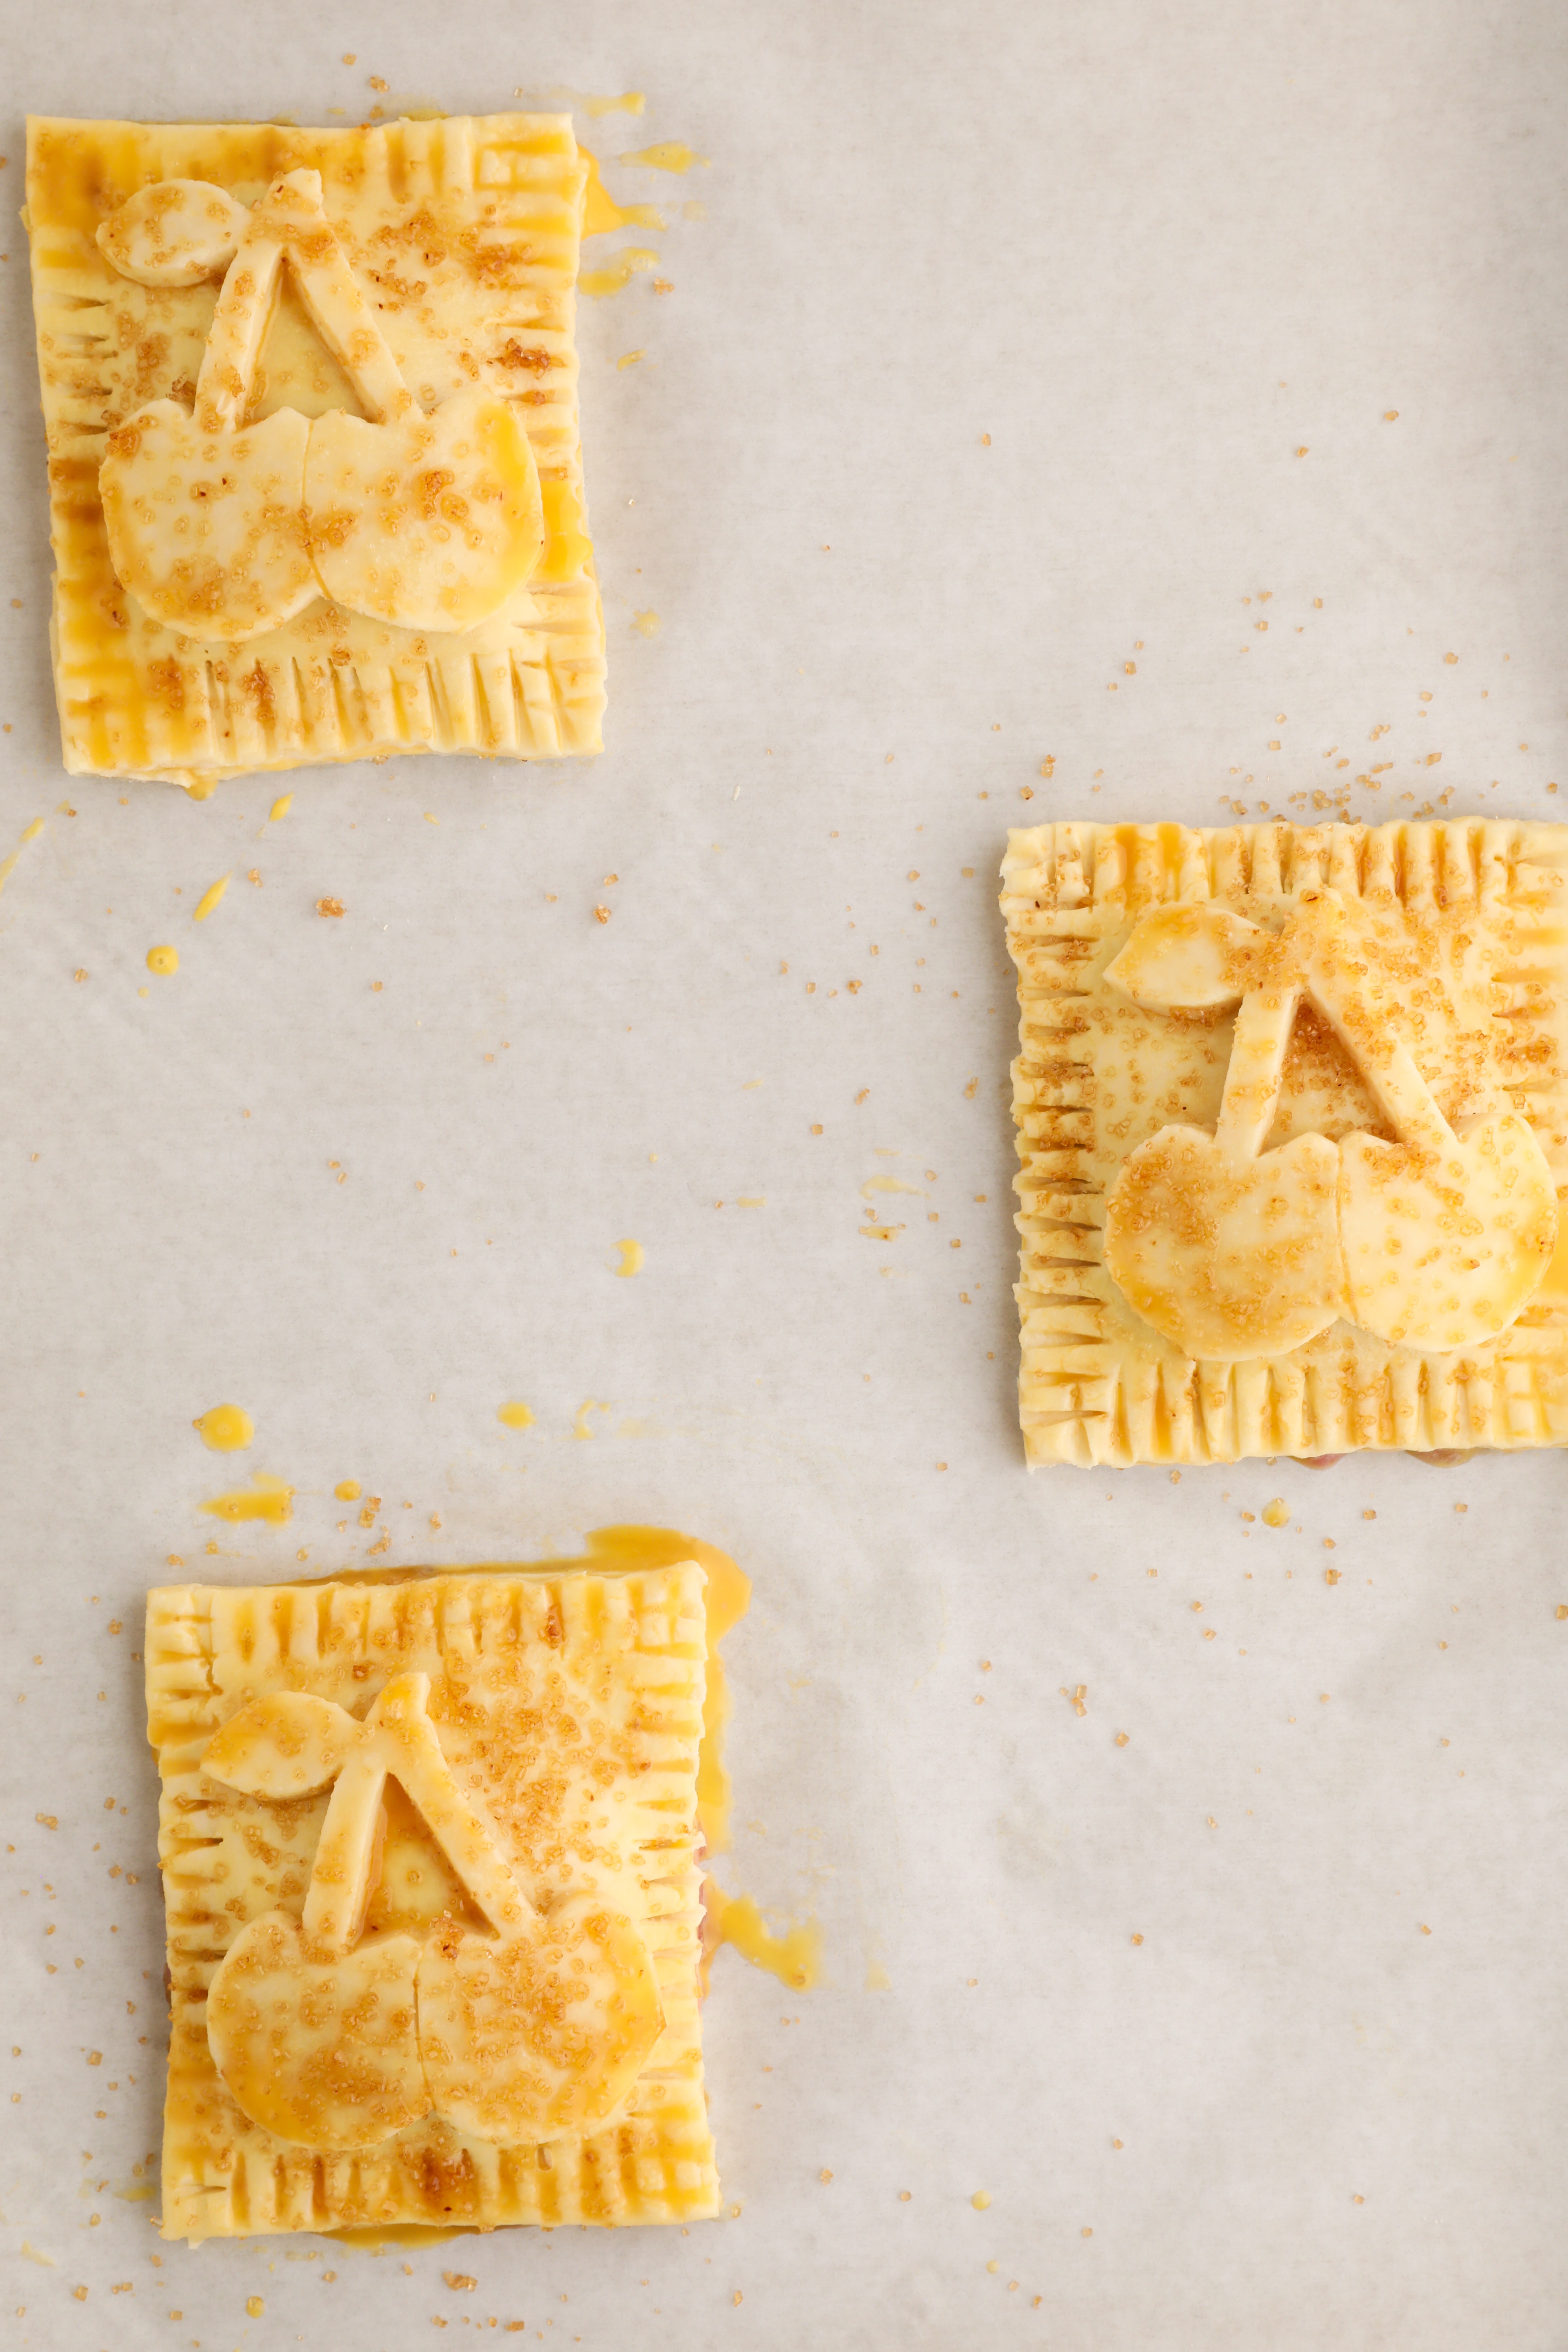
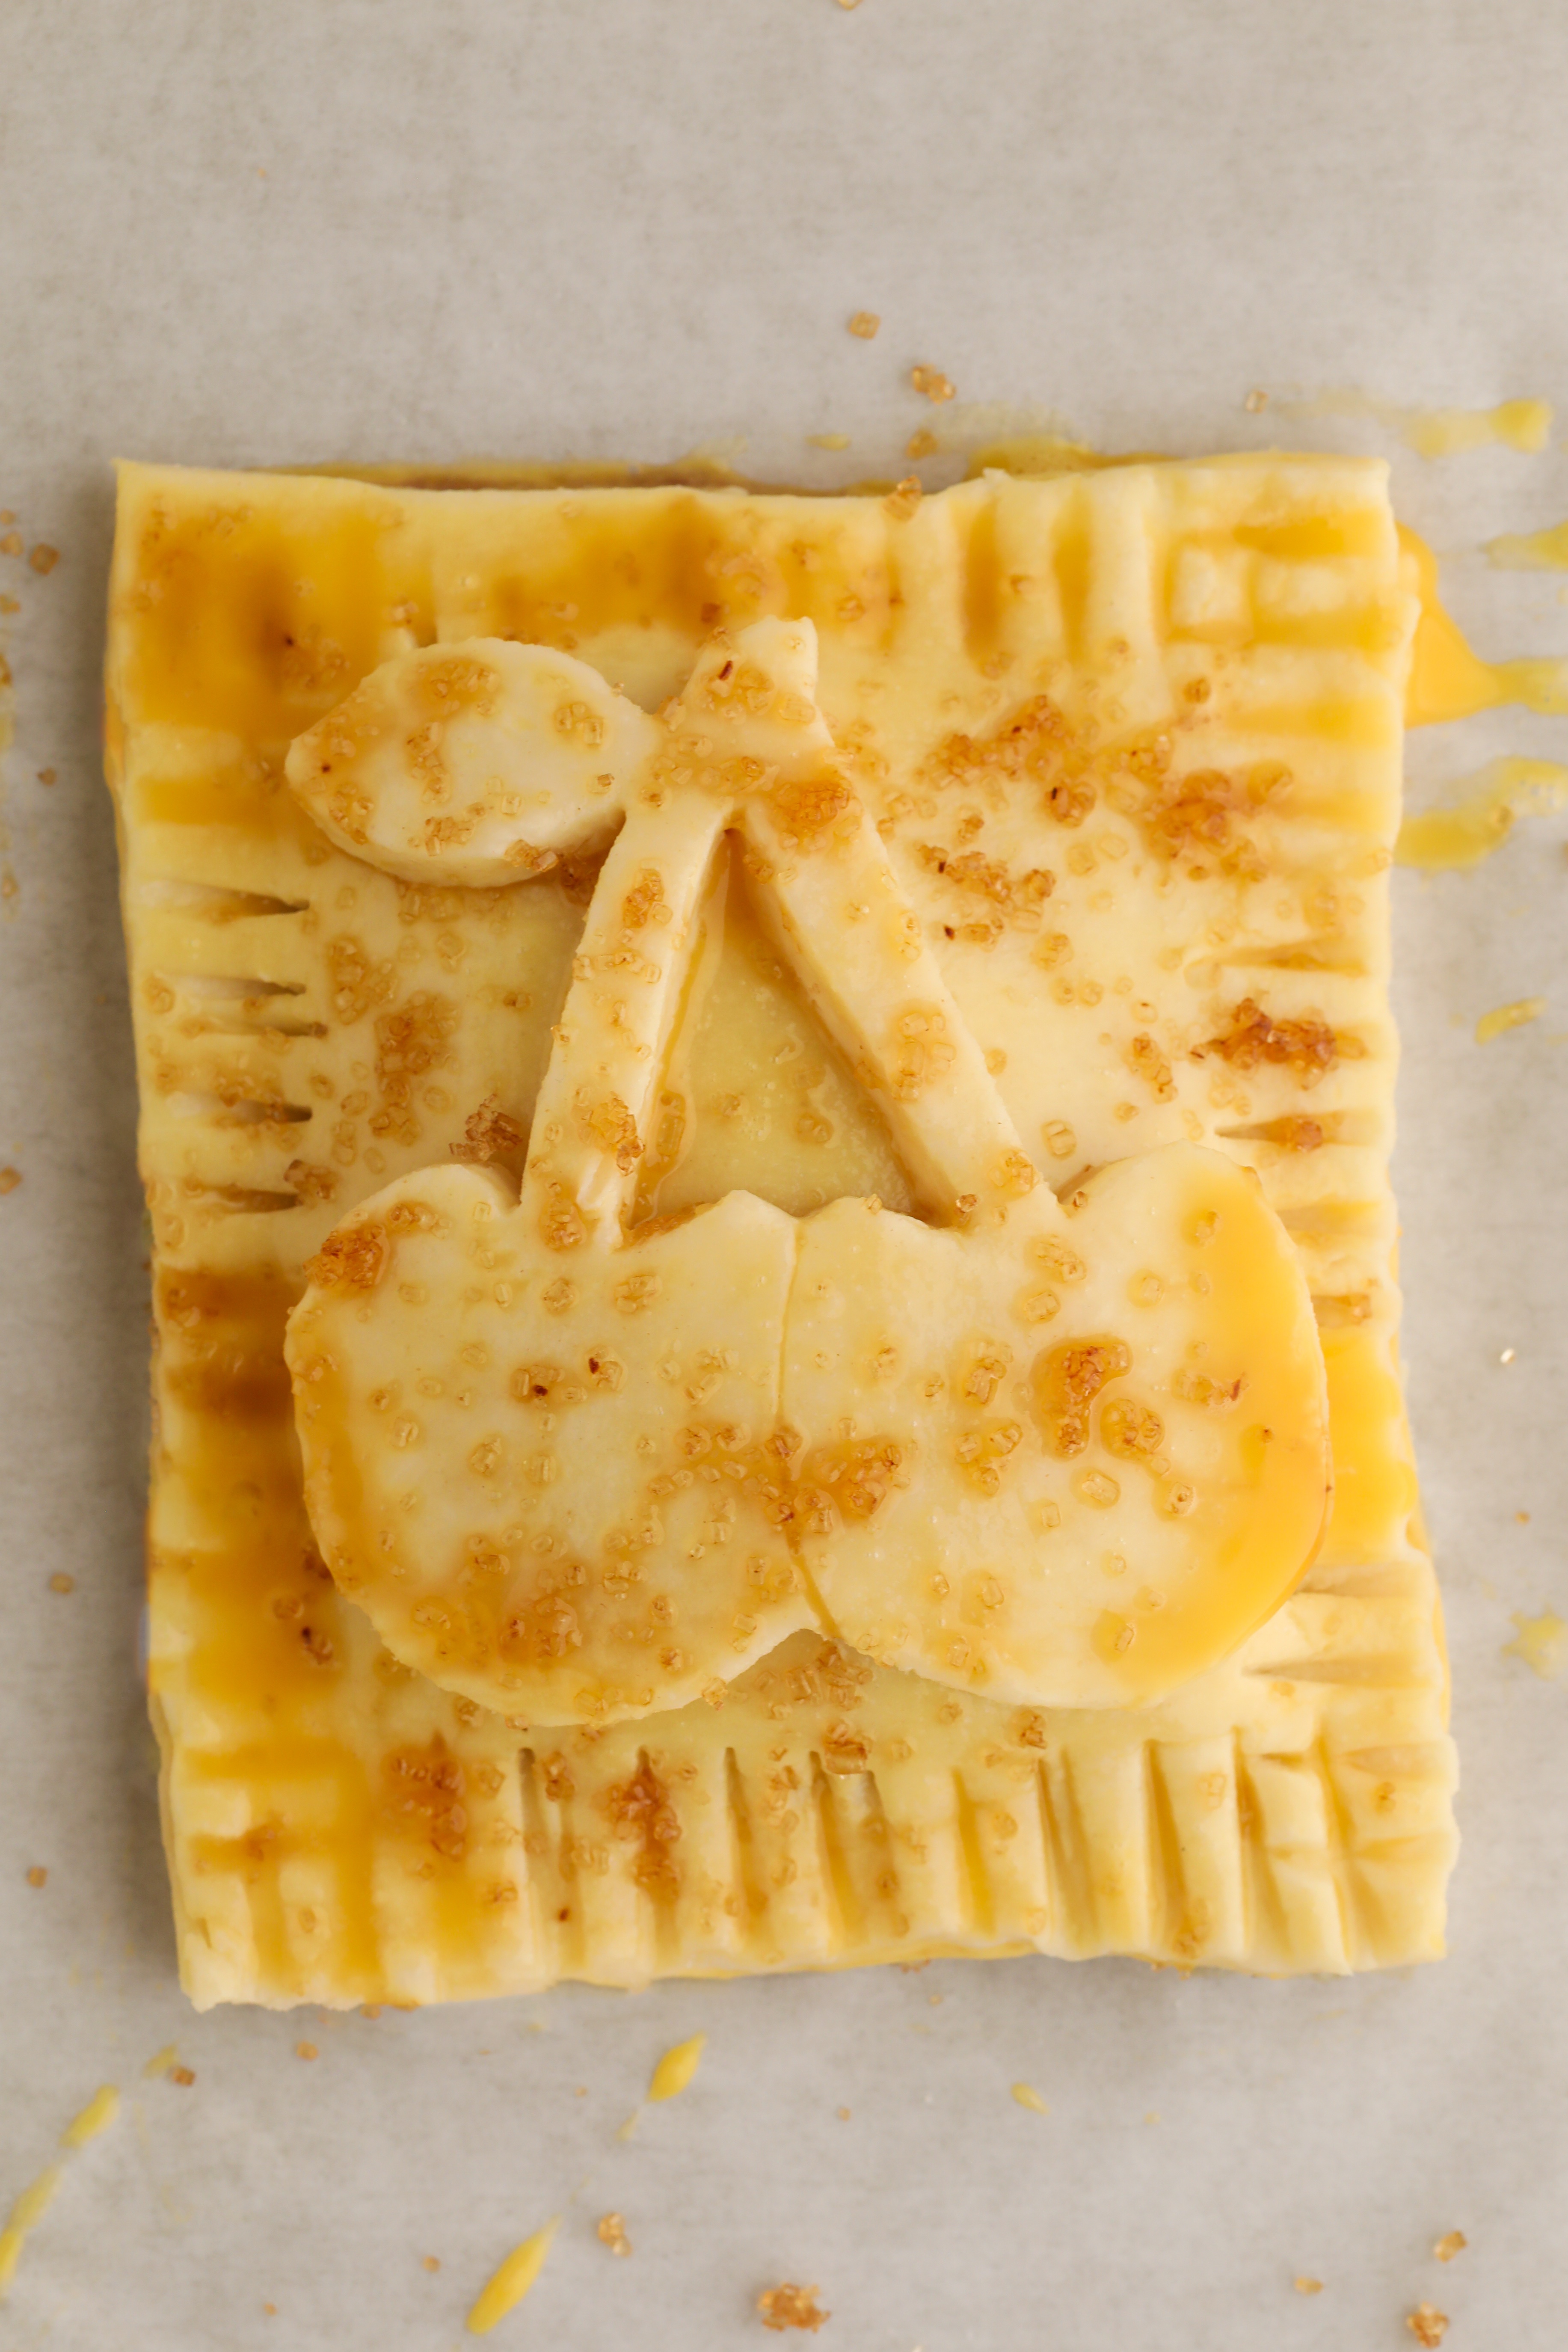
Gently press a fork along the edges of each pie to further seal them. Brush all three hand pies with egg wash. Place a cherry on top of each and carefully brush each cherry with egg wash as well.
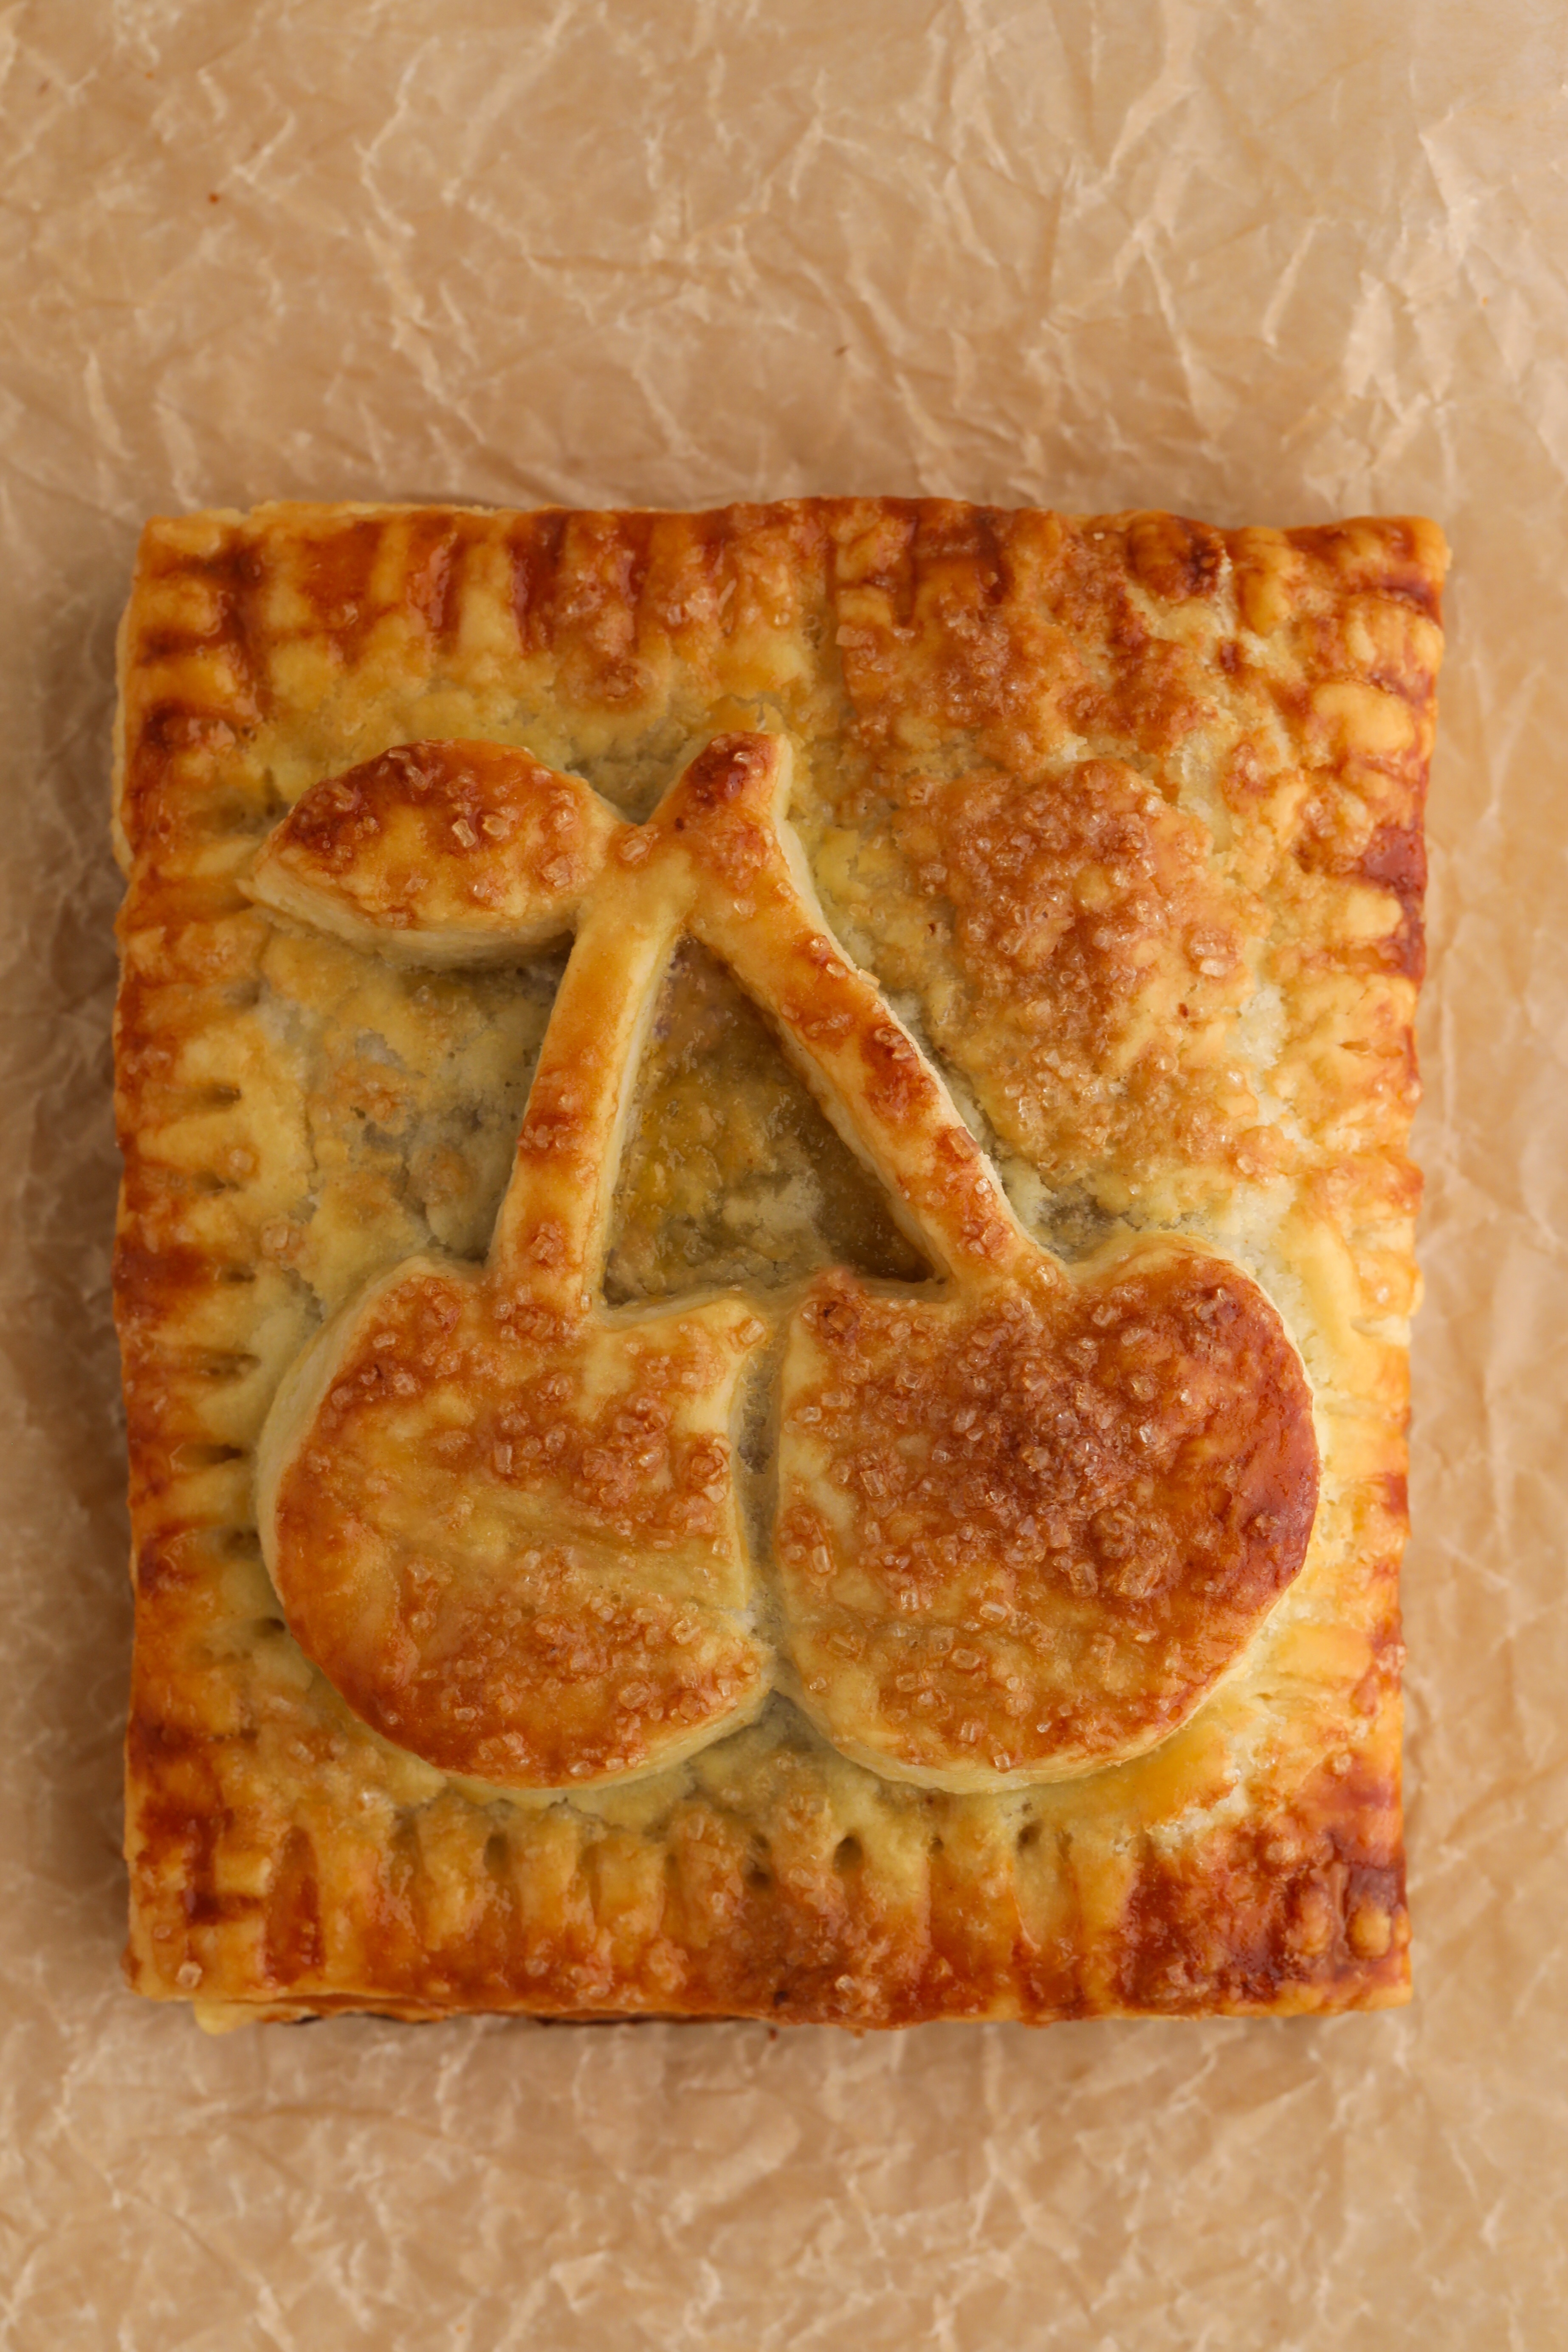
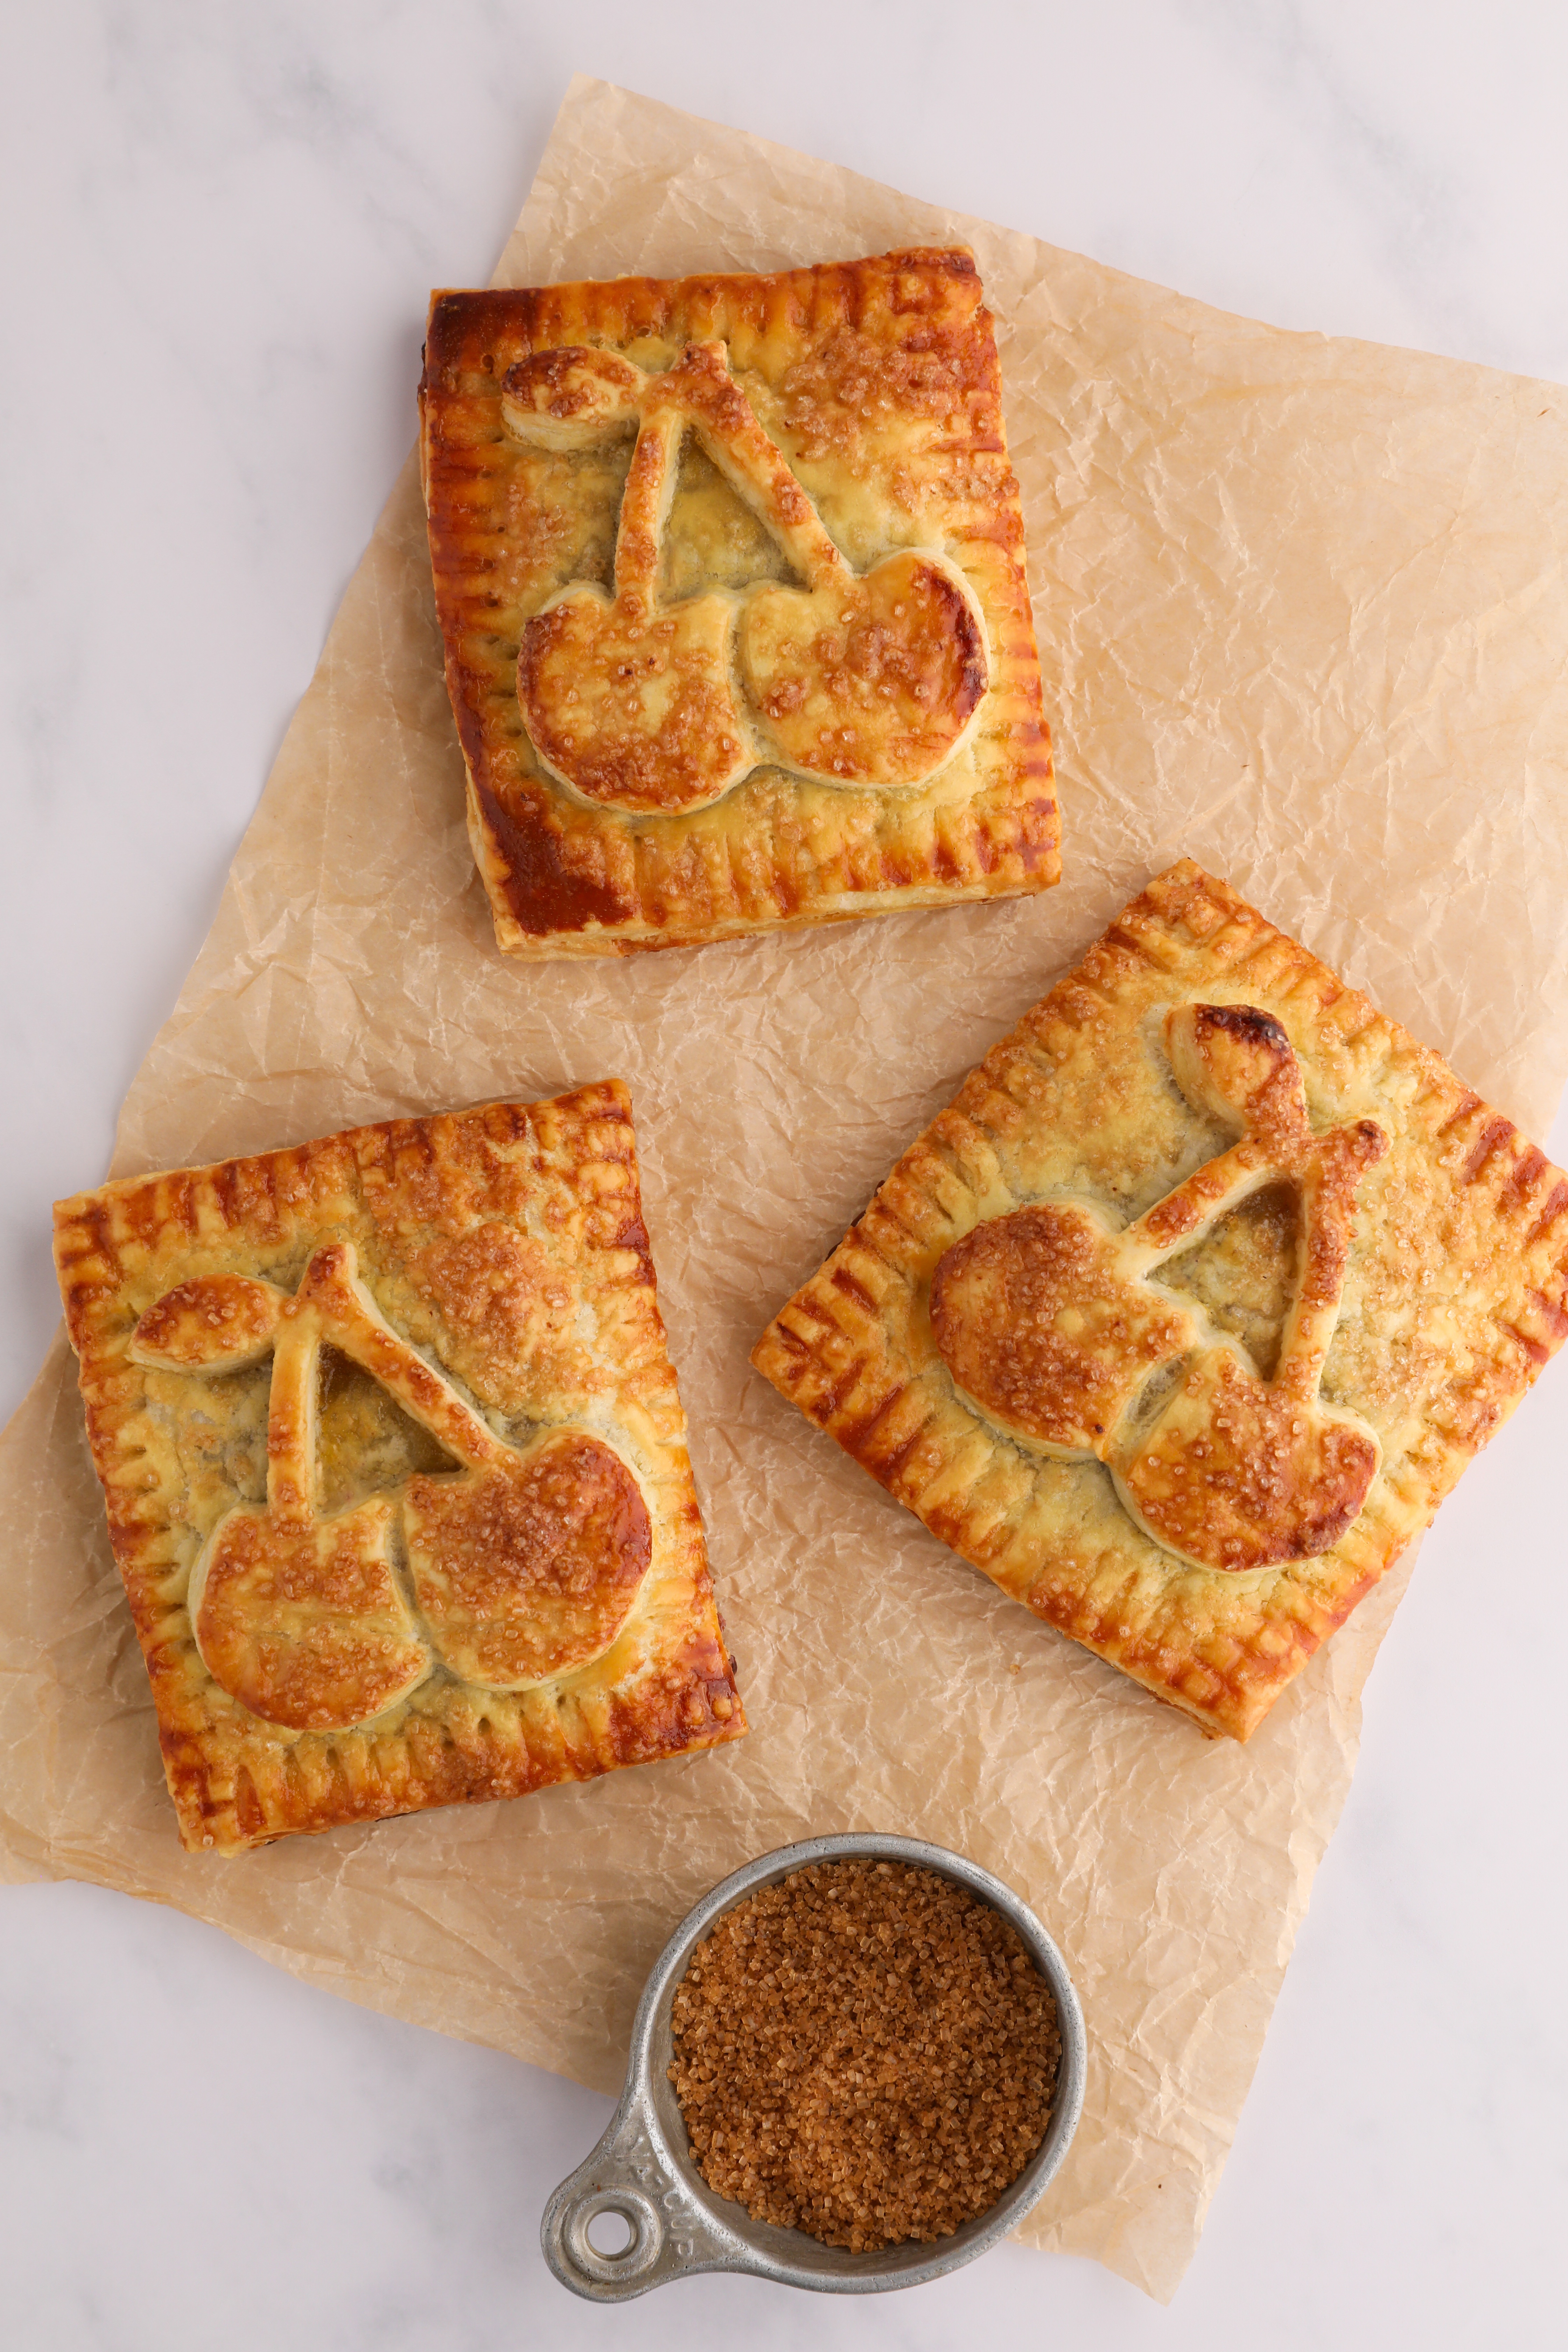
Top each hand pie with turbinado sugar before baking them for 30-35 minutes or until they are golden brown. These hand pies will keep for several days in an airtight container at room temperature, but are best when eaten fresh or reheated in the oven or microwave. Top them off with a scoop of vanilla ice cream or just enjoy them by themselves!
Cherry Hand Pies
These Cherry Hand Pies not only have a sweet cherry filling and flaky pie crust, but also have the perfect cherry design on the outside to make them extra fun. The best part is you don’t need any kind of cookie cutter for the cherry design since I’ve got a printable template for you!
- Prep Time: 30 minutes
- Cook Time: 30 minutes
- Total Time: 1 hour
- Yield: 3 servings
- Category: Dessert
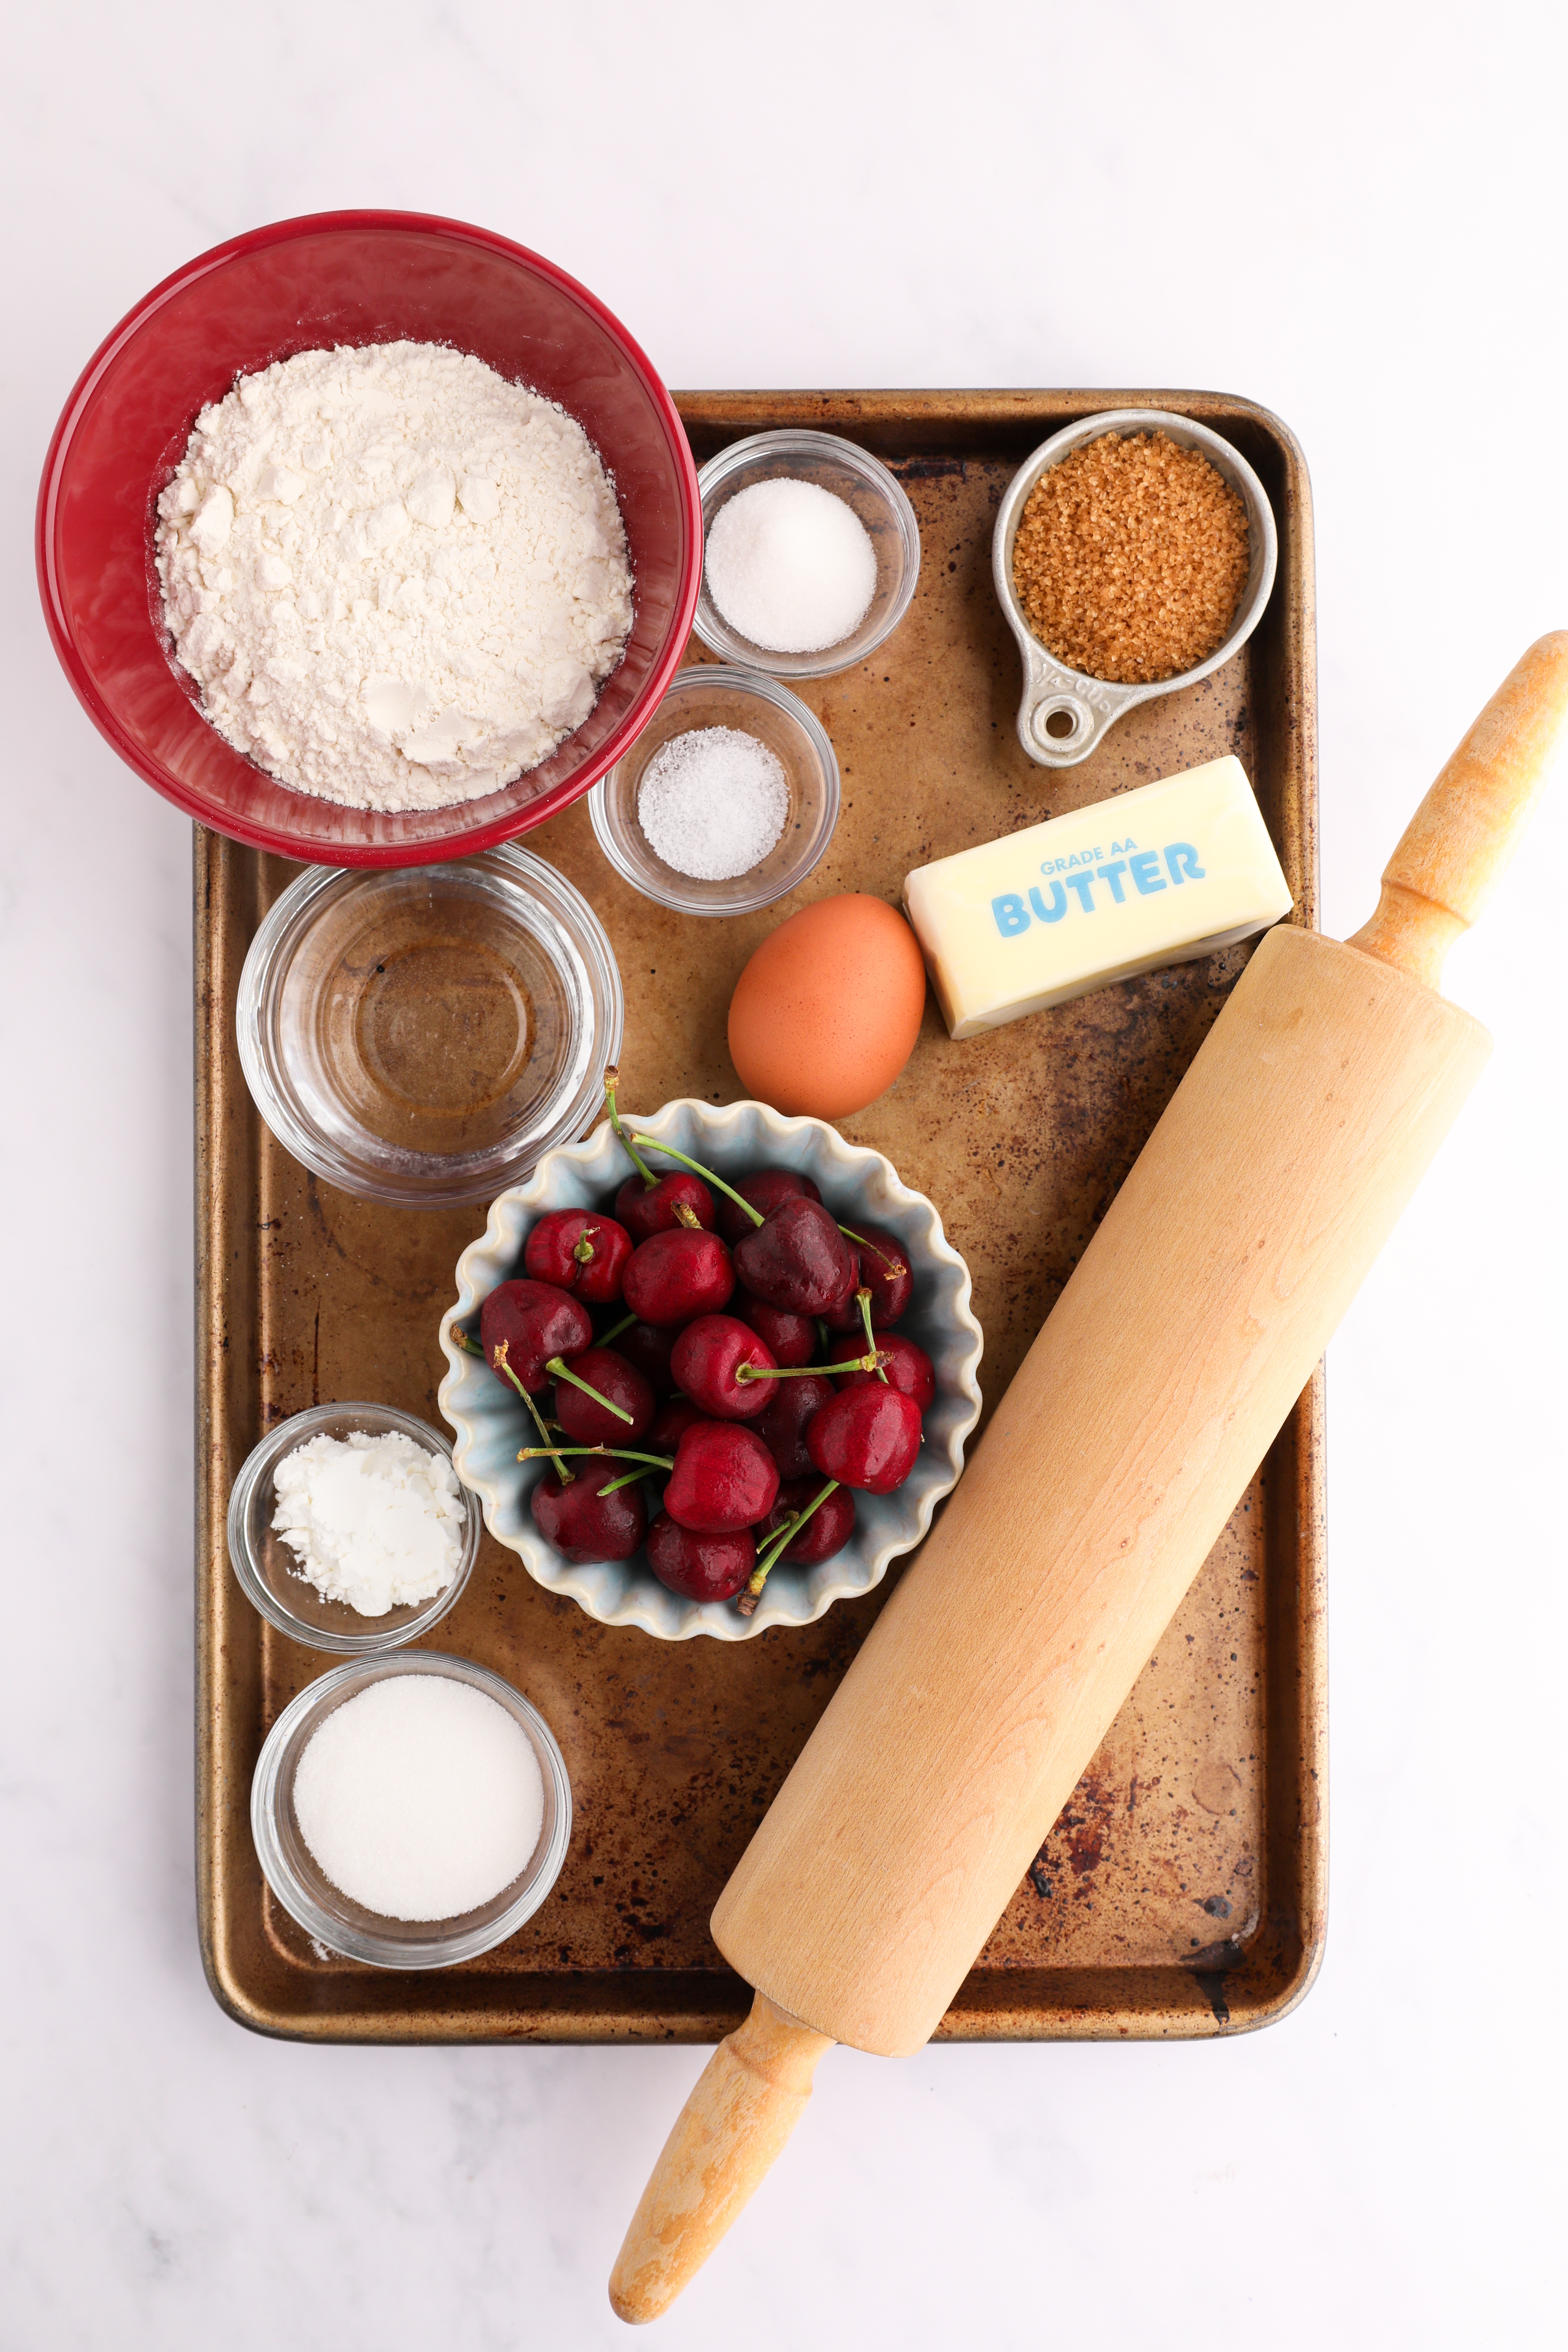
Ingredients
Pie Dough
- 150 grams (1 ¼ cups) flour
- 1 ½ tsp sugar
- ¼ tsp salt
- 4 oz (½ cup) unsalted butter, cubed
- 2-3 tablespoon ice cold water
Filling
- 1 cup cherries, pitted
- 2 tbsp sugar
- 2 ¼ tsp cornstarch
Topping
- 1 egg
- 2 tsp water
- Turbinado sugar
Instructions
- Preheat oven to 375º F.
- As the oven preheats, download, print, and cut out the cherry template on cardstock.
- Whisk together the flour, sugar, and salt in a large bowl.
- Blend the chilled butter into the flour mixture with your hands or a pastry blender until the butter is about pea sized.
- Pour the water over the flour mixture and stir together until it begins to form into a dough.
- Form the dough into a disk, wrap in plastic wrap, and chill.
- Stir together the cherries, sugar, and cornstarch in a nonstick pan over medium heat until it begins to thicken and the cherries start to burst. You can also smoosh down the cherries with the back of the spoon. Set this aside.
- Roll the dough out onto a lightly floured surface until it is just larger than 7” by 8”. Using a ruler and a pastry roller, cut the dough to 7” by 8”.
- Cut that large rectangle into half one way, turn it, and cut it into half again so you have four rectangles that are 3 ½” by 4”.
- Place the four rectangles on a parchment lined baking sheet and place back into the fridge to chill.
- Roll out the remaining dough again to cut out two more 3 ½ by 4 rectangles as well as the cherries.
- Once you have cut out the last two rectangles, place the leftover rolled out dough in the freezer for 5-10 minutes.
- Once the dough is very cold, place the cherry template over the dough and carefully cut around it using a sharp pairing knife. Repeat this process until you have three cherries. Transfer each cherry to a parchment lined baking sheet and place into the freezer.
- In a separate bowl, whisk together the egg and water.
- Carefully spoon the cherry filling into the center of three of the rectangles, making sure to leave a border.
- Brush the edges of the rectangles with egg wash and gently place another rectangle on top of each of them, carefully pressing down so that they adhere together. Place these back into the fridge.
- Clean up any extra edges on the cherry pie cut outs with a toothpick or knife so that they look as sharp as possible.
- Carefully use a knife to make a line outlining one of the cherries, but don’t cut all the way through.
- Gently press a fork along the edges of each pie to further seal them. Brush all three hand pies with egg wash. Place a cherry on top of each and carefully brush each cherry with egg wash as well.
- Top each hand pie with turbinado sugar before baking them for 30-35 minutes or until they are golden brown.
- Enjoy!
Notes
- If you don’t have turbinado sugar, you can use granulated or coarse sugar.
- If at any point your dough becomes difficult to work with, make sure to pop it into the fridge to chill. You never want your dough to become too warm. You can always chill it to let it rest.


Leave a Reply